Add and configure form fields
Add contact, choice, rating, upload, payment, consent, and layout fields to a Revup form or promotion.
Add and arrange fields
Form fields determine what participants see and what Revup stores.
- Open your promotion in the builder and select Form.
- In Form Fields, select Search for a field type.
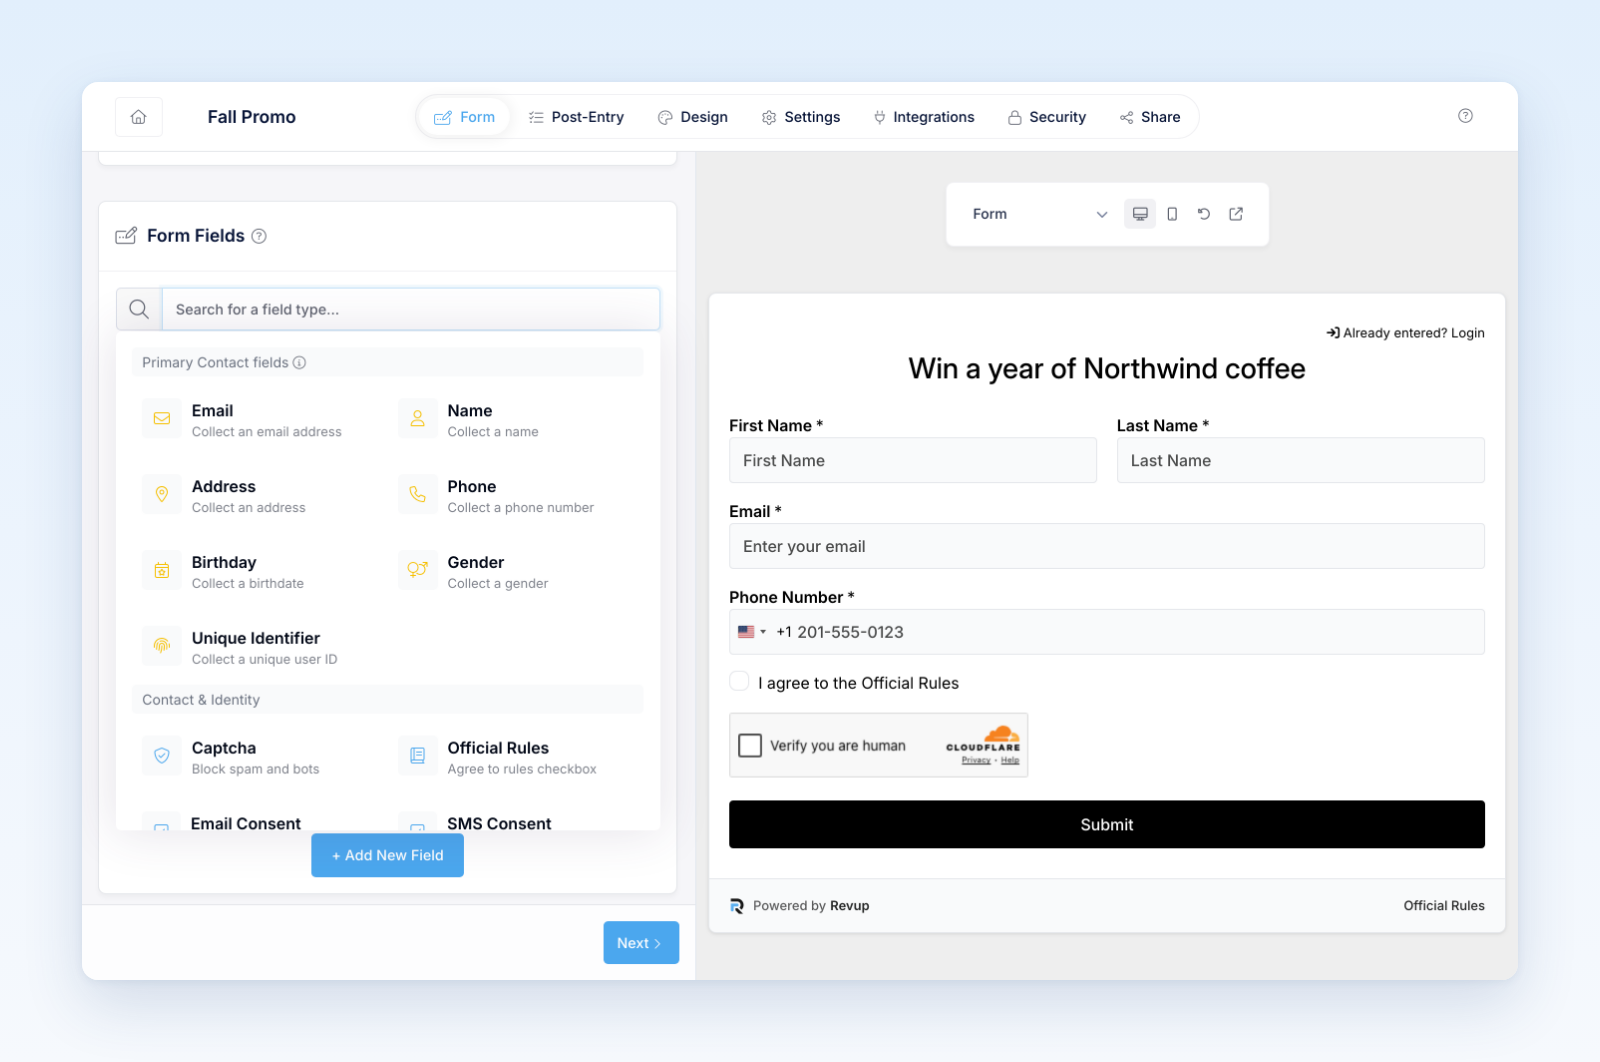
- Search for or select the field you want to add.
- Open the new field card and configure the available Basic, Validation, and Advanced settings.
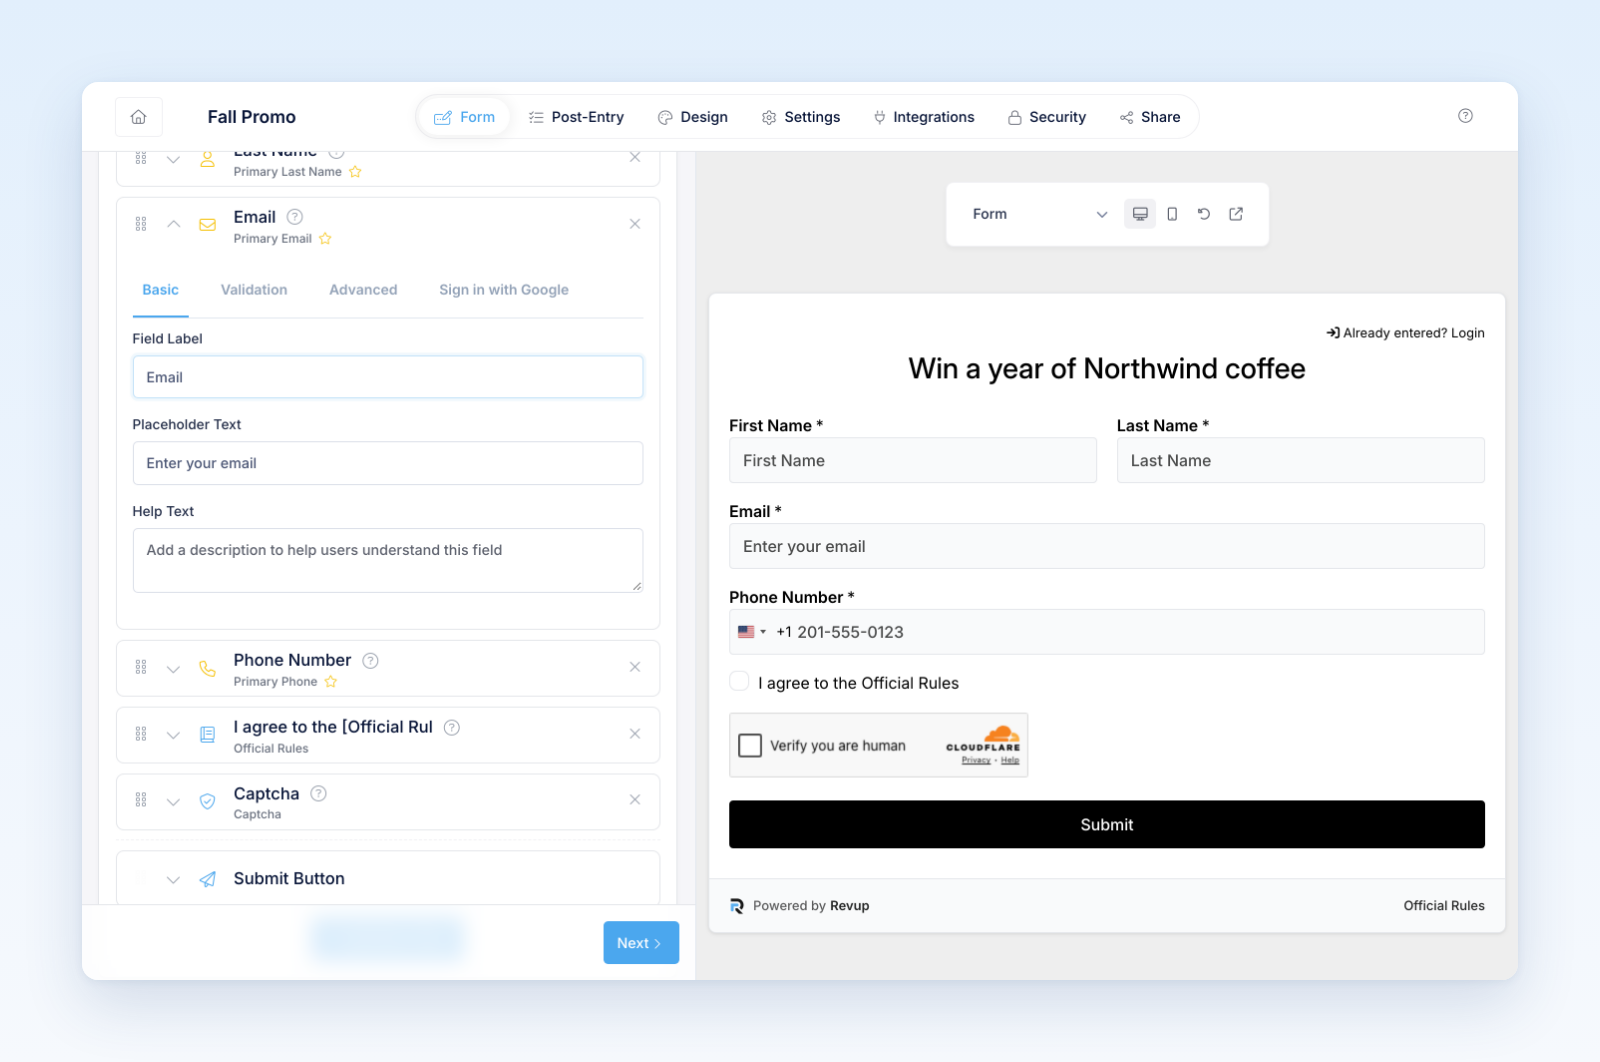
- Use the drag handle to place the field in the intended order.
- Review the field in the form preview.
Changes save automatically as you edit. The settings available in each field card depend on the field type.
Common settings include:
- Basic: Label, placeholder, help text, choices, and whether a response is required.
- Validation: The error message and field-specific rules such as verification, minimum age, character limits, or accepted values.
- Advanced: Field width, field ID, and whether the field is hidden when those options are supported.
Hidden fields
Turn on Hidden Field when a supported field should remain in the form without appearing to participants. This is useful when your site supplies a value instead of asking the participant to enter it. A hidden field is not a security control: someone using browser development tools may still be able to inspect or change its value. Do not use it by itself to prove eligibility, grant access, record consent, store a secret, or determine a prize outcome.
Field-based bonus entries
Turn on Bonus Entries to award the configured Entries to Award when a participant submits a non-empty value for that field. An optional field left blank does not award entries. Show Bonus Entries Badge controls whether the participant sees the amount beside the field; hiding the badge does not disable the award. Test both a completed and skipped response before publishing.
Fields that support multiple copies also show a duplicate control. Use the remove control to delete an optional field. A promotion must always keep at least one primary identifier: Email, Phone, or Unique Identifier.
Primary and additional contact fields
Primary contact fields are marked with a star in the builder. Revup uses them to create and update the participant's contact profile. Email, Phone, and Unique Identifier can each identify a participant. You can remove Email after adding a Phone or Unique Identifier field, but Revup will prevent you from removing the last remaining primary identifier.
Additional contact fields are stored with the form submission but do not create a separate contact profile. Use an Additional field when you need information about someone other than the participant, such as a guest, nominee, parent, shipping recipient, or emergency contact.
Primary contact fields
Consent, access, and security fields
Payment and approval fields
Additional contact fields
Questions and response fields
Layout and instructional fields
These fields organize or explain the form. They do not collect a participant response.
Submit button
The Submit Button is always shown after the form fields and is configured separately. You can change its text, width, alignment, and submission-confetti setting. Its colors come from Design → Colors.
Good field design
- Ask only for information you will use.
- Use one clear question per field.
- Use the field's label for the question and help text for extra context or format requirements.
- Choose the response type that requires the least effort while still collecting useful data.
- Make consent specific and separate from unrelated terms.
- Use required fields sparingly.
- Keep option lists complete, mutually understandable, and free of overlapping answers.
- Preview narrow mobile layouts after changing field width.
Before publishing
- Complete the form once on desktop and once on mobile.
- Trigger every required-field and validation error you configured.
- Confirm conditional or product-specific fields behave as expected.
- Check that response labels are understandable in Participants and exports.
- Verify any integration field mappings after adding, deleting, or changing fields.
Changing a form does not rewrite earlier submissions. Existing submissions keep the data that was collected when they were submitted.
Was this helpful?
Still need help? Ask the team