Connect Mailchimp
Connect Mailchimp to a Revup promotion, choose an audience, set tags and double opt-in, and map participant information.
Before you start
- Sign in to the Mailchimp account that should receive participants, with permission to authorize integrations.
- Have an audience ready in Mailchimp. If needed, follow Mailchimp's guide to creating an audience.
- For email subscriptions, add a visible Email field to your promotion's form. Add Email Consent if participants should choose whether to receive your marketing emails.
- Purchase Sweepstakes promotions do not have an Integrations tab, so you cannot connect Mailchimp to them.
Connect Mailchimp to a Revup promotion
- Open the promotion builder, go to Integrations, and select + Add Integration.
- Choose Mailchimp from the available integrations. You can type
Mailchimpin Search integrations... to find it. If your account already has Mailchimp connected, select + Add next to that connected account instead.
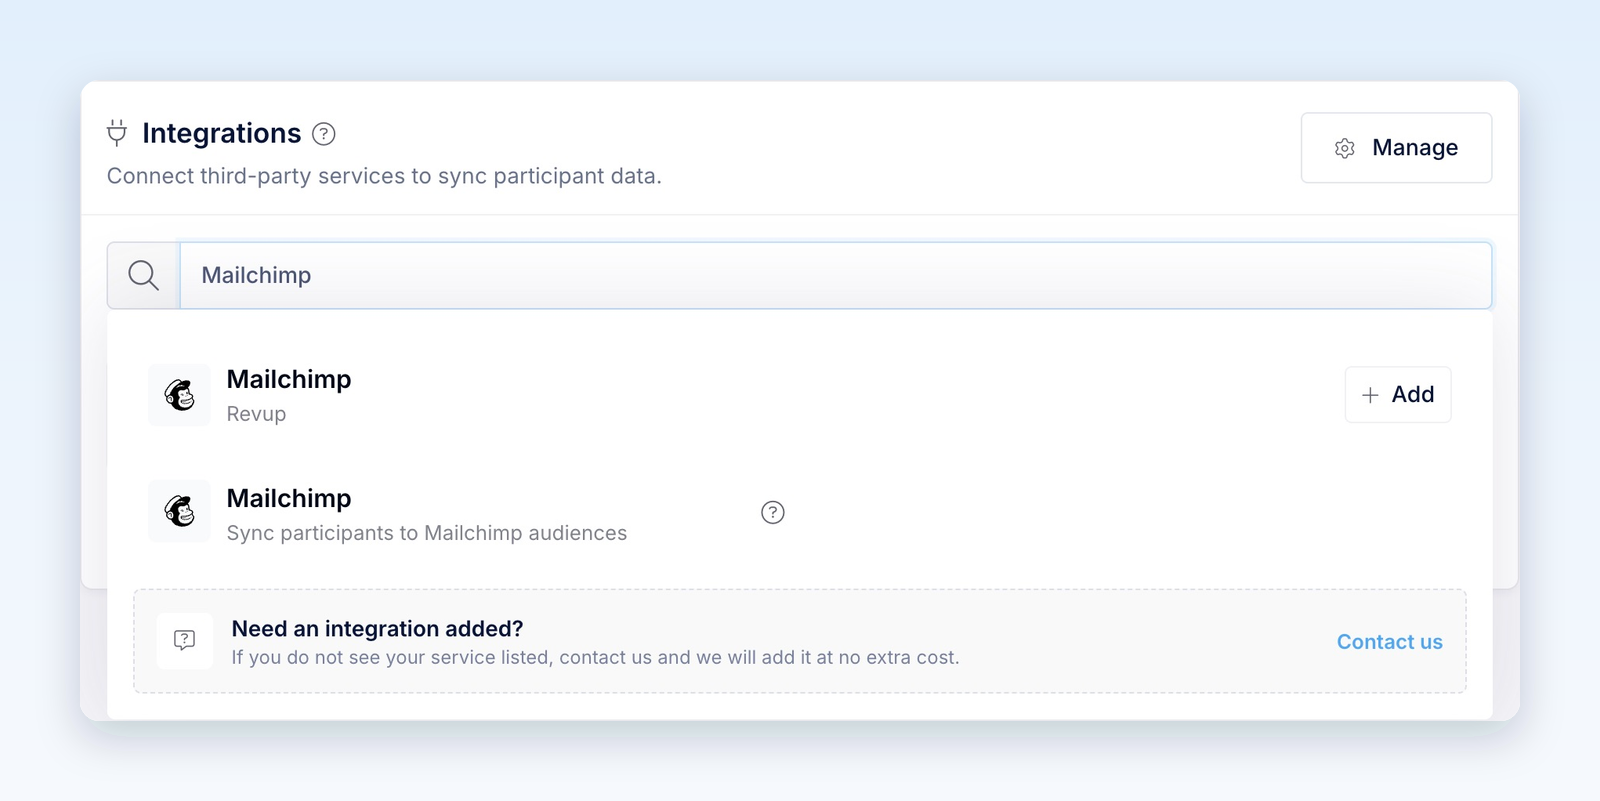
- In the Mailchimp window, sign in if needed and approve Revup's requested access. You do not need to copy an API key. Return to Revup when authorization finishes.
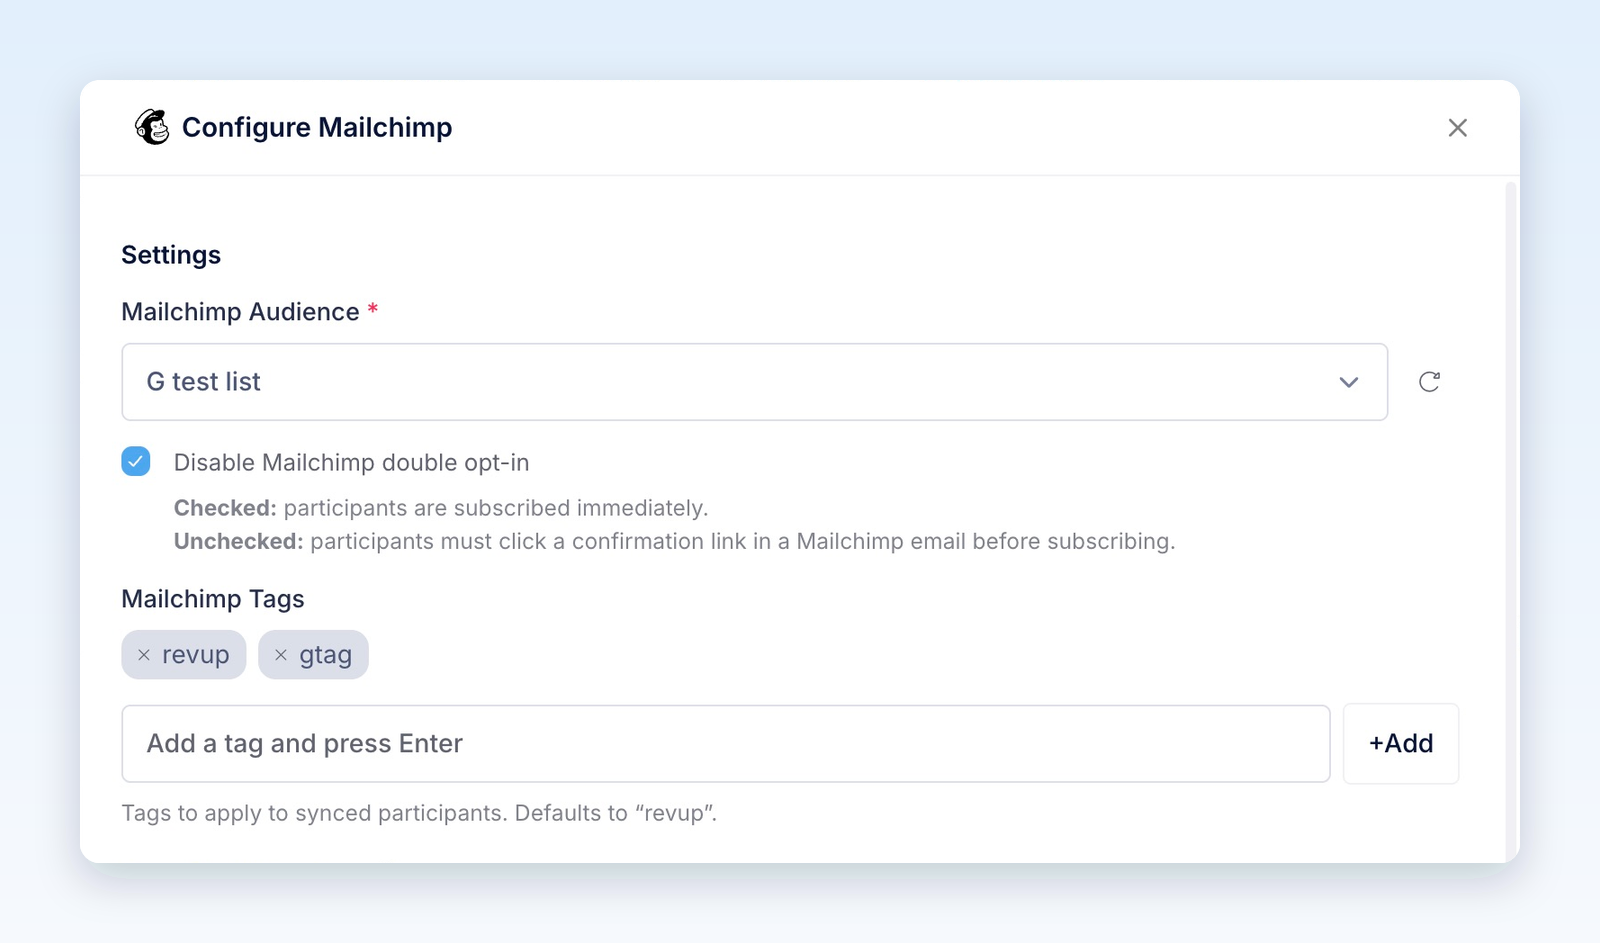
- In Configure Mailchimp, choose the Mailchimp Audience that should receive participants. Use the refresh icon beside the dropdown if you just created an audience.
- Review Disable Mailchimp double opt-in. It is checked by default. Leave it checked to request an immediate email subscription, or uncheck it to require confirmation for new email subscribers. See Choose your email subscription settings below for existing-contact behavior.
- Under Mailchimp Tags, add a tag and press Enter or select +Add. The default tag is
revup. Add a promotion-specific tag, such asfall-giveaway, to identify this promotion's participants later.
- Under Form Field Mapping, choose the Mailchimp audience field that should receive each answer. Email is automatically mapped and locked. Choose Do not sync this field to exclude an answer, or + Create custom field to create a text field in the selected audience.
- Expand System Fields and review the promotion details you want to send, such as Promotion ID and Referral Link.
- Select Save. The Mailchimp card shows Active, the connected account, and the selected audience.
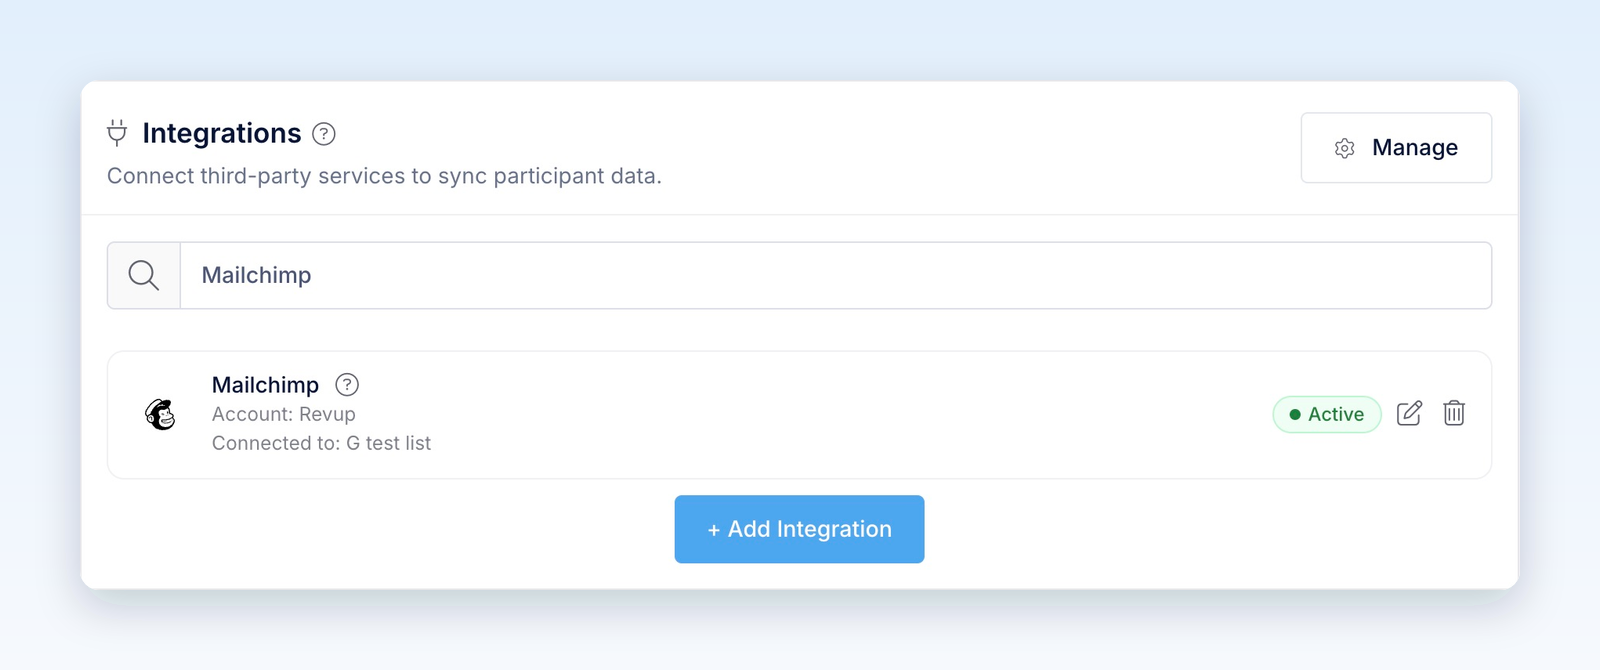
Active means the integration is configured. Complete the delivery check below to confirm that participants reach Mailchimp.
Choose your email subscription settings
Revup's Disable Mailchimp double opt-in setting controls email subscription requests from this integration. Review it for each promotion; changing Mailchimp's hosted signup-form settings alone does not configure Revup's connection.
The checkbox does not replace the participant's consent choice. If your form includes Email Consent and it is unchecked, Revup leaves the email address out of the sync. If your form includes SMS Consent and it is unchecked, Revup leaves the phone number out. If neither usable identifier remains, the participant is not sent.
Without an Email Consent field, Revup's email-consent check does not block delivery. Choose your form fields and subscription setting before collecting entries. Adding a phone number to an email contact's audience field does not, by itself, enroll that contact in Mailchimp SMS marketing.
Mailchimp's double opt-in guide explains the confirmation process.
Map names, addresses, and custom answers
Revup offers mappings for names, phone number, address components, gender, and birthday. Review each destination rather than assuming every form field will be sent. Birthday maps to User Birthday, a text field created by Revup; it is not automatically mapped to Mailchimp's native Birthday field.
Mailchimp stores mapped answers in audience fields, also called merge fields. Those fields belong to the selected audience. After changing Mailchimp Audience, review the mappings again.
Send a full address
When the destination is Mailchimp's full Address field, Revup needs values for Address, City, State, and Postal Code. Keep all four mapped. Address2 and Country can also be included when mapped and provided.
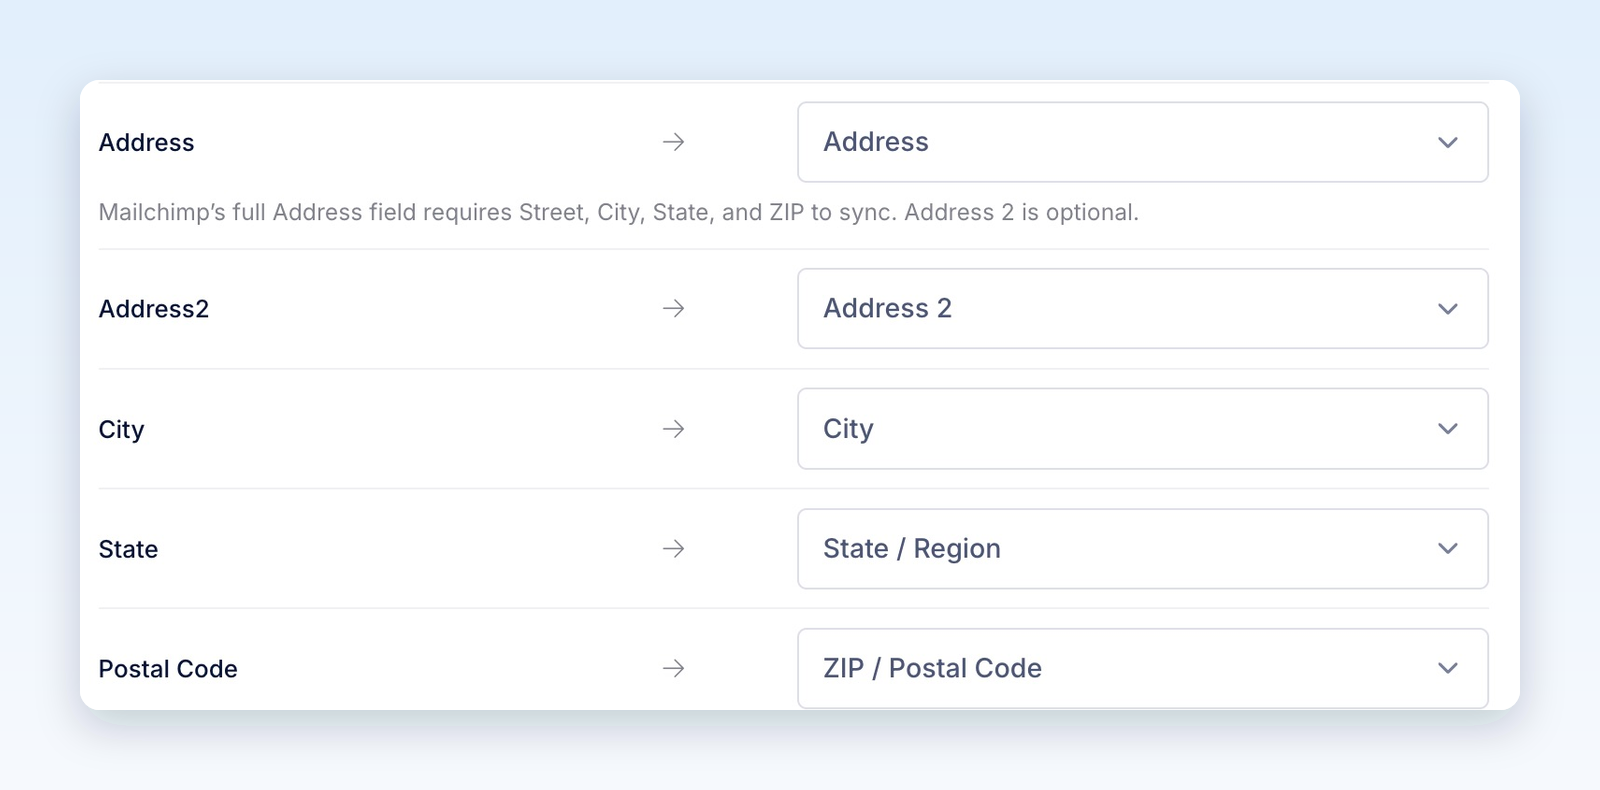
If a required component is missing, the full address is omitted while other valid fields can still sync. Mapping Address alone is not enough. If you only collect a street line, map it to a custom text field instead of a full address field.
Match the field format
- Number fields need numeric answers.
- Dropdown and radio fields need an answer matching one of Mailchimp's choices.
- A standalone Mailchimp ZIP field accepts five digits. Use a text field for other postal-code formats; international postal codes are also supported inside a complete address.
- URL fields need a complete
http://orhttps://link.
Blank answers are omitted and do not clear existing Mailchimp values. Incompatible values may be omitted with a Partially synced delivery result, or rejected by Mailchimp. Check the participant's delivery detail when a field is missing.
The merge-field counter beside Form Field Mapping shows the audience's field usage. Revup creates missing mapped fields when it can. If the field limit is reached, new fields may not be created even though existing fields still sync. Reuse an existing compatible field or reduce unnecessary mappings, then verify the result in Mailchimp.
Send promotion details to Mailchimp
Expand System Fields to choose which promotion details to send. These mappings can be changed or set to Do not sync this field.
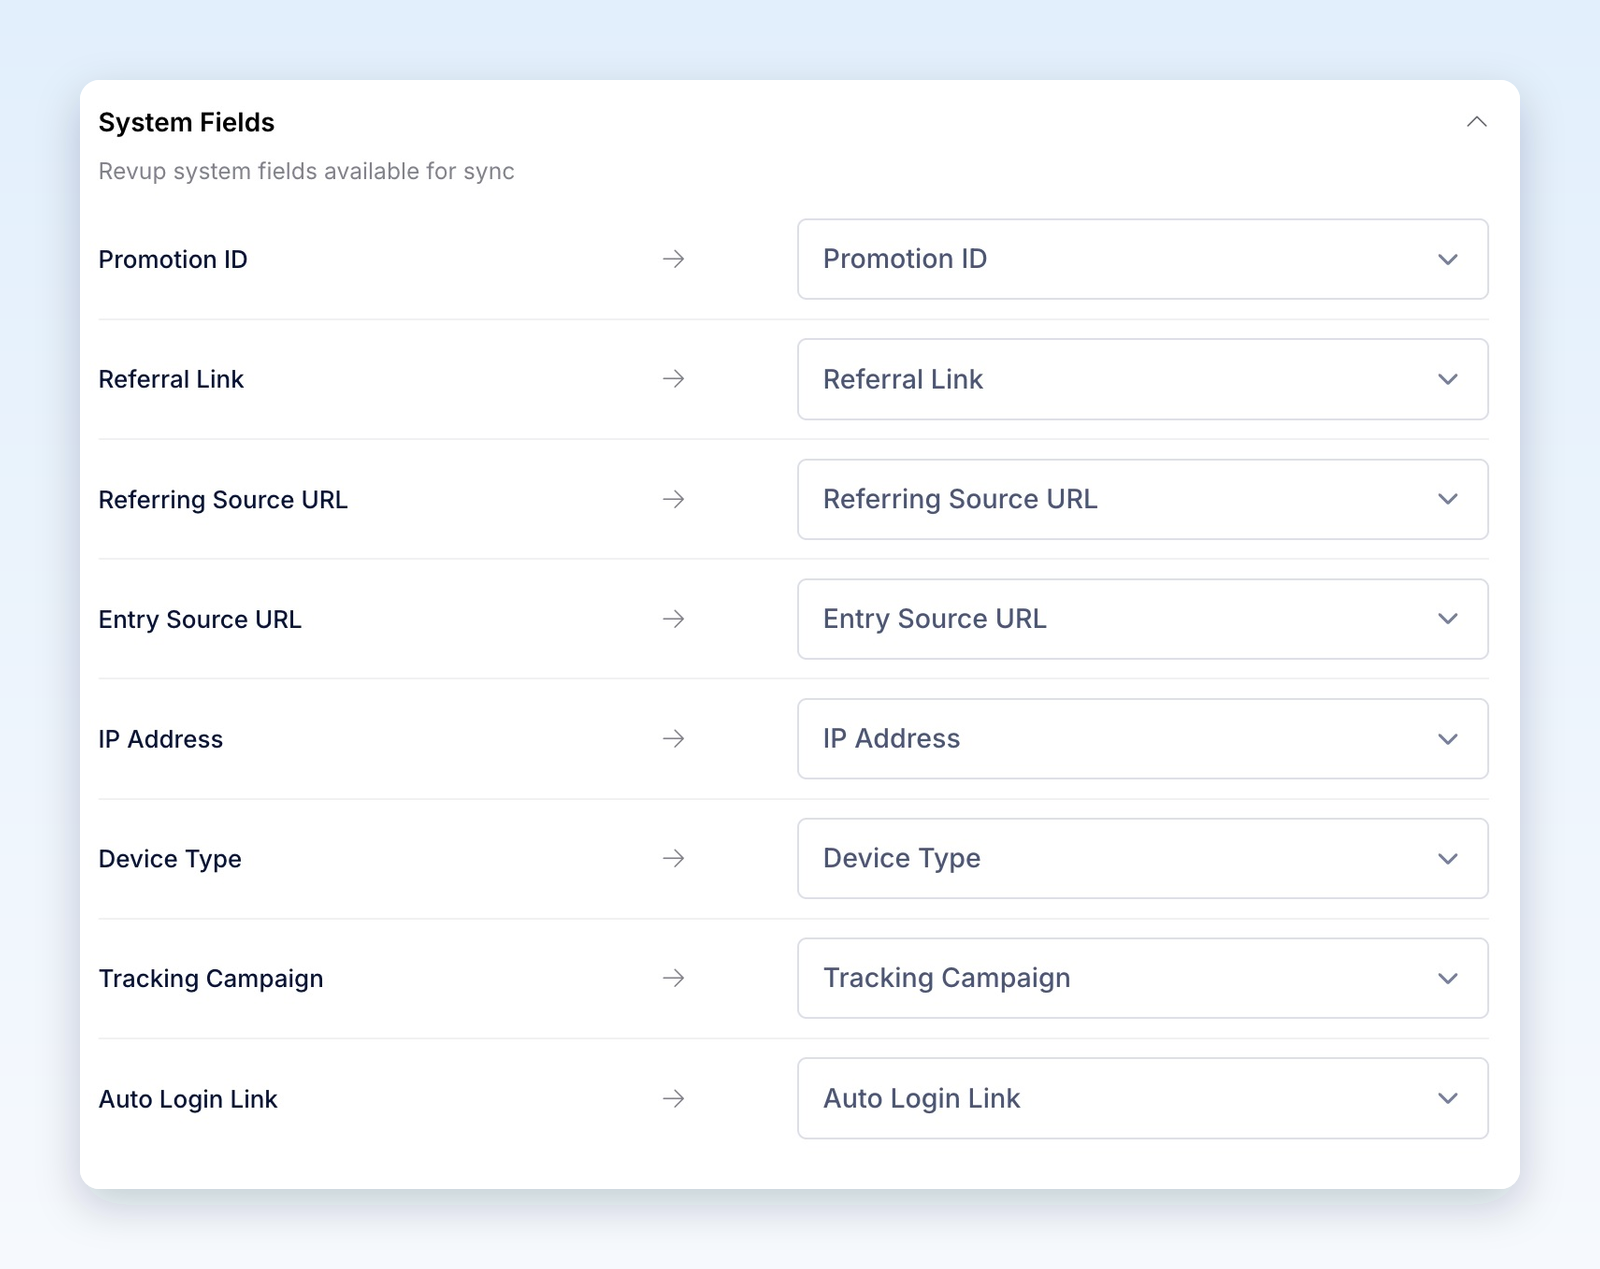
These fields hold the most recently synced values. If someone enters another connected promotion using the same email and audience, that promotion can replace the earlier values.
Group participants with tags
Use a different Mailchimp Tags value for each promotion when you want to keep its participants identifiable within the same audience. Revup adds the configured tags without removing unrelated tags already on the contact. If you leave the tags empty, Revup restores the default revup tag when you save.
A promotion-specific tag preserves that grouping even if a later entry updates Promotion ID. You can use tags to filter contacts and build segments in Mailchimp. See Mailchimp's guide to tags.
Changing tags in Revup affects future syncs; it does not remove tags already applied in Mailchimp.
Use referral and return links in Mailchimp emails
If you map Referral Link and Auto Login Link, their audience fields are available for email personalization through Mailchimp merge tags.
The default merge tags are *|REFLINK|* and *|AUTOLOGIN|*. If you choose another destination field, use that field's merge tag instead. Follow Mailchimp's merge-tag guide and preview with a contact's actual values before sending.
- Referral Link: lets the participant share the promotion. Eligible referred entries can count toward an enabled Share with friends bonus action.
- Auto Login Link: returns the participant to their own entry. This link is private; send it only to that participant, never in a public post or shared page.
Check that both links belong to the intended promotion. A later sync can update them.
Check your first delivery
- After the promotion starts, open its public link and submit an entry with your own email address. Select any consent choices needed for your test.
- In Mailchimp, open the selected audience and search for that email address. Revup creates or updates the contact, so an existing record may have changed instead of a new one appearing.
- Check the mapped answers, promotion fields, tags, and email subscription status. If double opt-in is enabled, use a new email address and complete the confirmation email to check the full process.
- In Revup, open the participant and review Activity for delivery details.
Entries submitted through the builder preview are test entries and are never sent to integrations. During a trial, integrations sync only the first 20 participants across the Revup account. Upgrading enables future syncs; skipped participants are not sent retroactively.
Use Mailchimp in another promotion
The Mailchimp account stays connected to your Revup account. In another promotion, open Integrations → + Add Integration, then select + Add beside Mailchimp under Your Connected Accounts. Choose that promotion's audience, tags, double opt-in setting, and mappings, then select Save.
Each promotion keeps its own configuration. Select Manage in the Integrations panel or visit Account → Integrations to review connected accounts.
Disconnect Mailchimp
- Stop syncing one promotion: Select the trash icon on its Mailchimp card, then Yes, remove. Other promotions can keep using the connected account.
- Disconnect the account everywhere: Go to Account → Integrations, open the Mailchimp connection's actions menu, and select Disconnect. If promotions use it, confirm Yes, disconnect from all.
Disconnecting stops future syncs. It does not remove contacts, field values, or tags already sent to Mailchimp.
Troubleshooting
- Authorization does not open: Allow pop-ups for Revup and try again. Confirm that your Mailchimp user can authorize integrations.
- Audience missing: Check the connected Mailchimp account, confirm the audience exists there, and select the refresh icon beside Mailchimp Audience.
- Setup Required: Open the edit icon, select an audience, review mappings, and select Save.
- Participant missing: Check whether it was a preview entry, whether consent removed the email or phone, and whether the trial limit was reached. Search the correct audience for an existing contact.
- Contact is Pending: Check the double opt-in setting and the participant's confirmation email. An existing unsubscribed contact is not automatically resubscribed when double opt-in is enabled.
- Field or address missing: Check its mapping, submitted value, field type, and audience field limit. For a full address, check all required components. Review any Partially synced detail before changing settings.
- Failed delivery: Check the connection and audience, resolve the reported problem, then open the participant's Activity and select the retry icon (Retry Mailchimp) beside the failed delivery.
Was this helpful?
Still need help? Ask the team