Connect Constant Contact
Connect Constant Contact to a Revup promotion, choose a list and tags, map fields, and confirm participants reach your account.
Before you start
- Sign in to the Constant Contact account that should receive participants, and make sure it has the list you want to use.
- Your form needs a visible Email or Phone Number field. For phone-only promotions, add SMS Consent so participants can explicitly opt in to SMS delivery.
- Purchase Sweepstakes promotions do not have an Integrations tab, so you cannot connect Constant Contact to them.
Connect Constant Contact to a Revup promotion
- Open the promotion builder, go to Integrations, and select + Add Integration.
- Choose Constant Contact. If your Revup account already has Constant Contact connected, follow Use Constant Contact in your next promotion below instead.
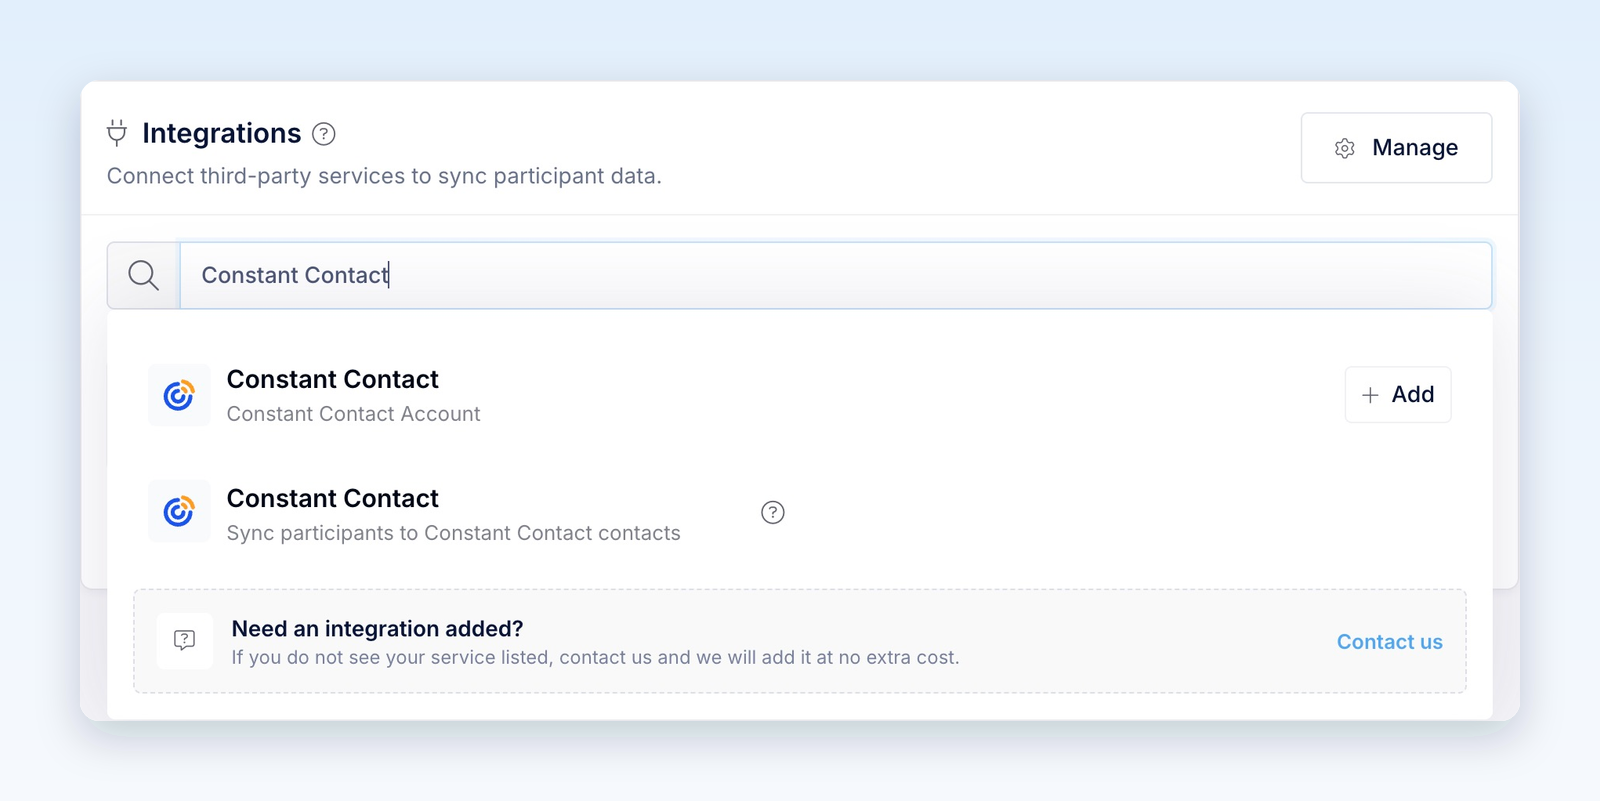
- In the Constant Contact authorization window, sign in if needed and allow Revup to access the intended account. You do not need to copy an API key. Return to Revup when the window closes.
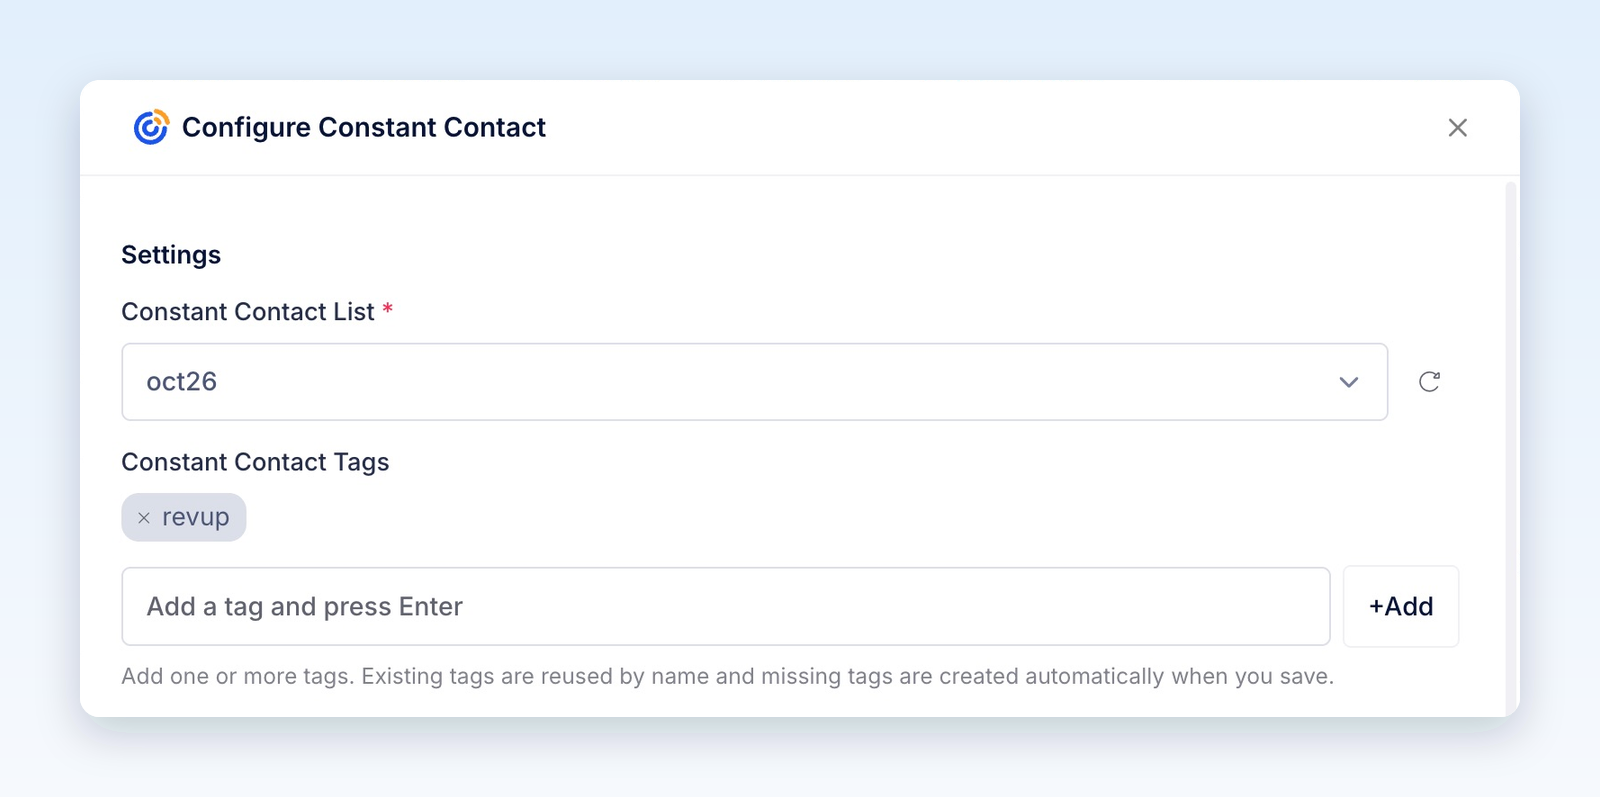
- In Configure Constant Contact, choose the Constant Contact List that participants should join. If a new list is missing, select the refresh icon next to the list.
- Under Constant Contact Tags, add any tags you want applied to participants from this promotion. Type a tag and press Enter, or select +Add. Revup reuses existing tags by name and creates missing tags when you save.
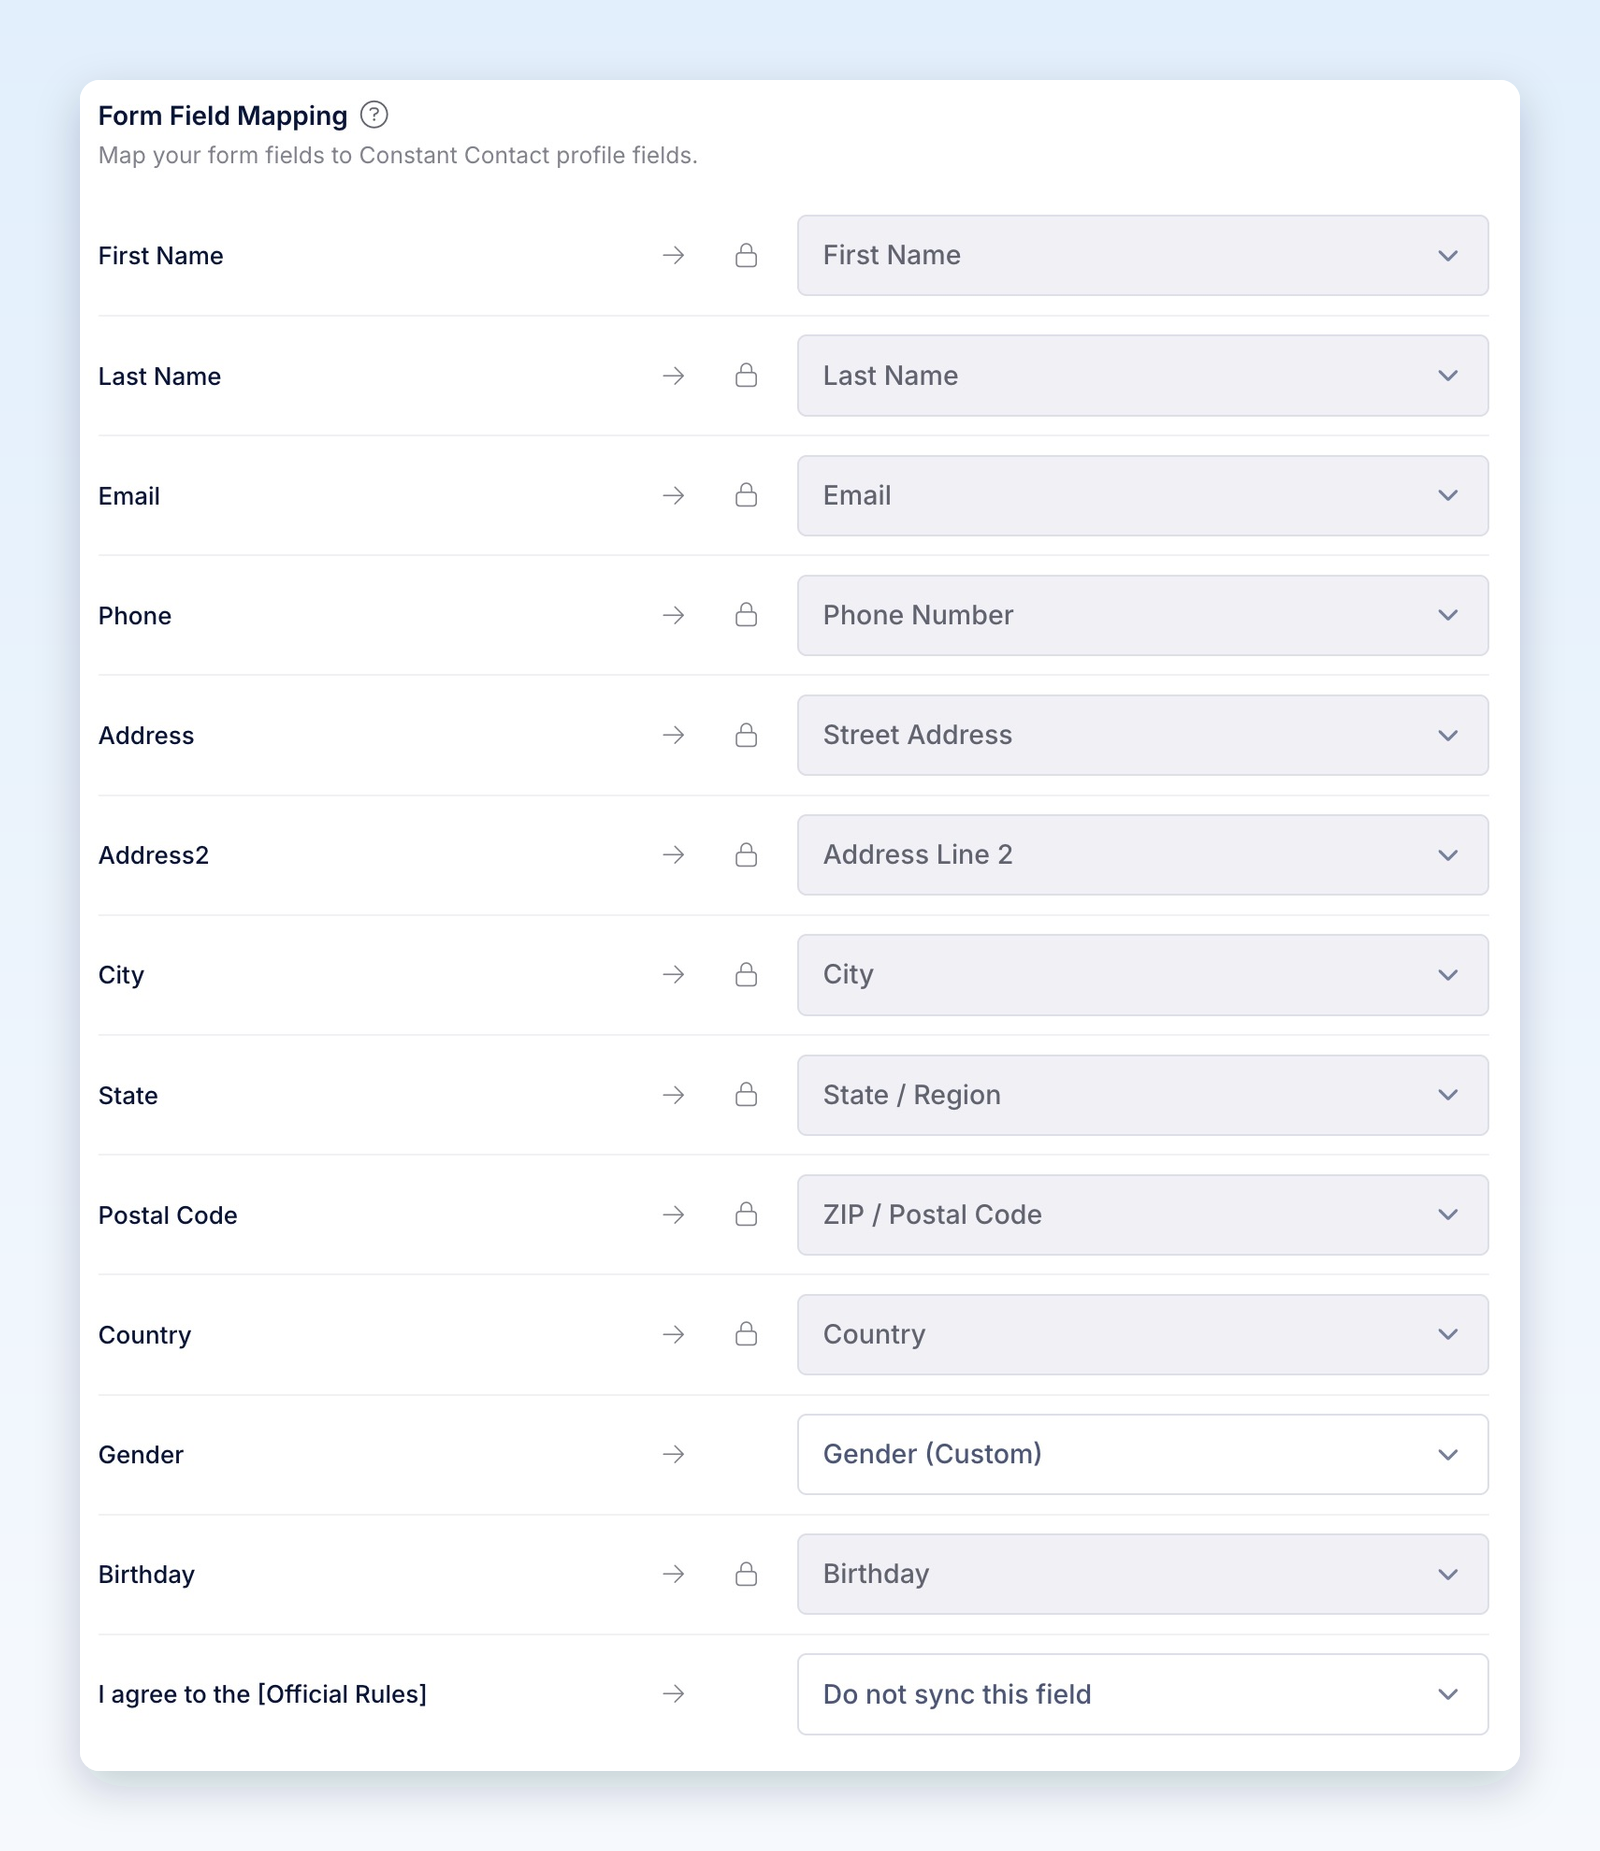
- Under Form Field Mapping, choose a Constant Contact field for each form field you want to send. Fields with a lock icon are mapped automatically. For editable mappings, choose Do not sync this field to leave a field out, or + Create custom field to add a Constant Contact custom field. Open a dropdown and use Search to find an existing field.
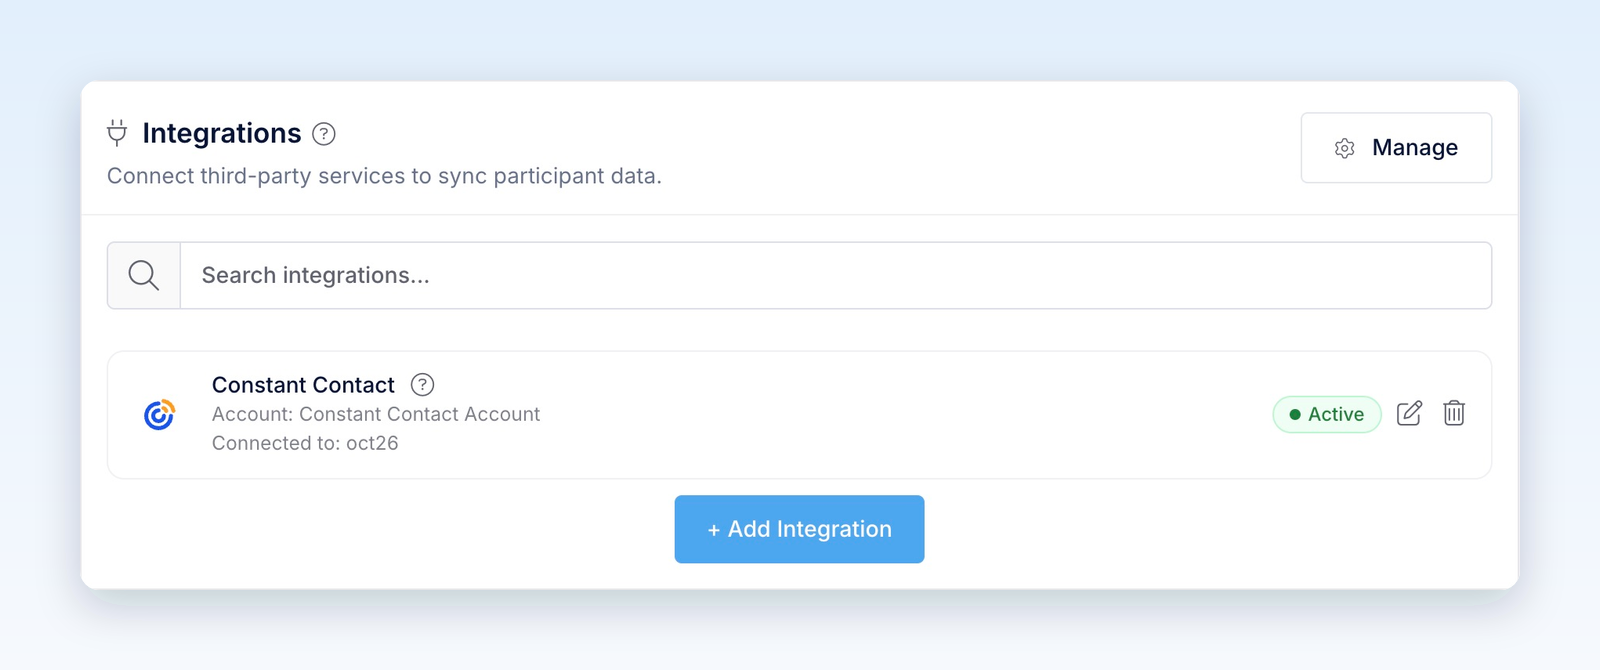
- Select Save. The Constant Contact card shows Active with the connected account and list.
- After the promotion starts, enter once through its public link with your own contact details and the consent choices you want to test. In Constant Contact, open Contacts and confirm the contact, list membership, tags, and mapped fields. If you collected SMS consent, also check the contact's SMS subscription status.
Entries you submit from the builder preview are test entries. Revup never sends test entries to Constant Contact or any other integration, so use a real entry to check delivery.
Use Constant Contact in your next promotion
You only authorize the account once. Constant Contact stays connected to your Revup account, so you can use it in other promotions.
- In the promotion builder, go to Integrations and select + Add Integration.
- Under Your Connected Accounts, select + Add next to Constant Contact.
- Configure Constant Contact opens. Choose the list, tags, and field mapping for this promotion, then select Save.
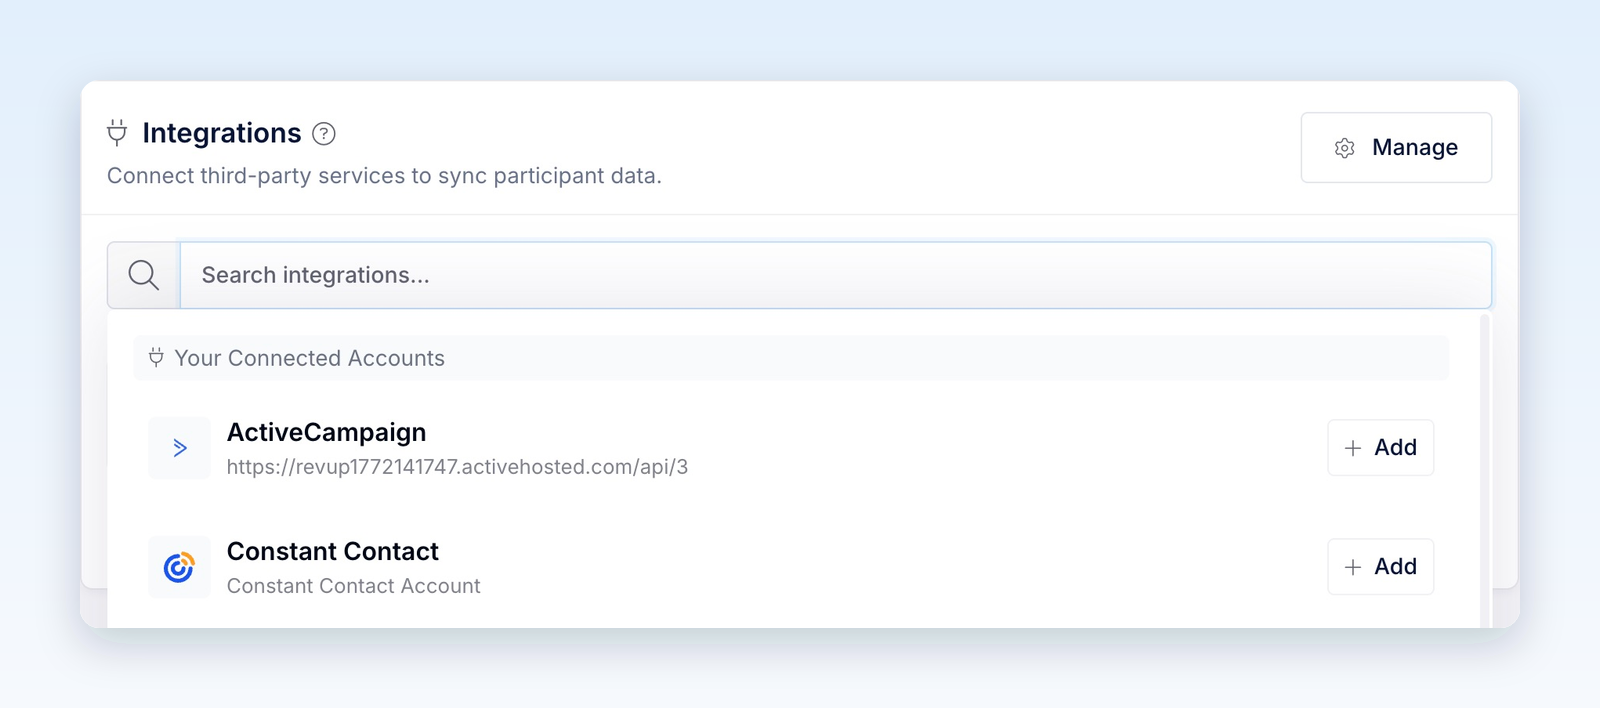
Each promotion keeps its own list, tags, and field mapping. To review connected accounts in one place, select Manage in the Integrations panel or go to Account → Integrations.
What Revup sends to Constant Contact
Revup sends the participant's permitted contact details, adds the contact to your selected list, and applies your tags. When an email address is already in Constant Contact, Revup updates that contact instead of creating a new one.
- Email, First Name, Last Name, and Phone Number go to standard contact fields. Phone numbers include the country code, for example
+12015550101. - Address, Address Line 2, City, State, Postal Code, and Country go to the contact's standard home address fields.
- Birthday sends the month and day to Constant Contact's standard birthday fields. The year is not sent by the automatic birthday mapping.
- Other mapped form fields go to Constant Contact custom fields. Revup creates missing custom fields as text fields when you save.
Revup also sends the following custom fields when they have a value. They are locked in the System Fields section of Configure Constant Contact.
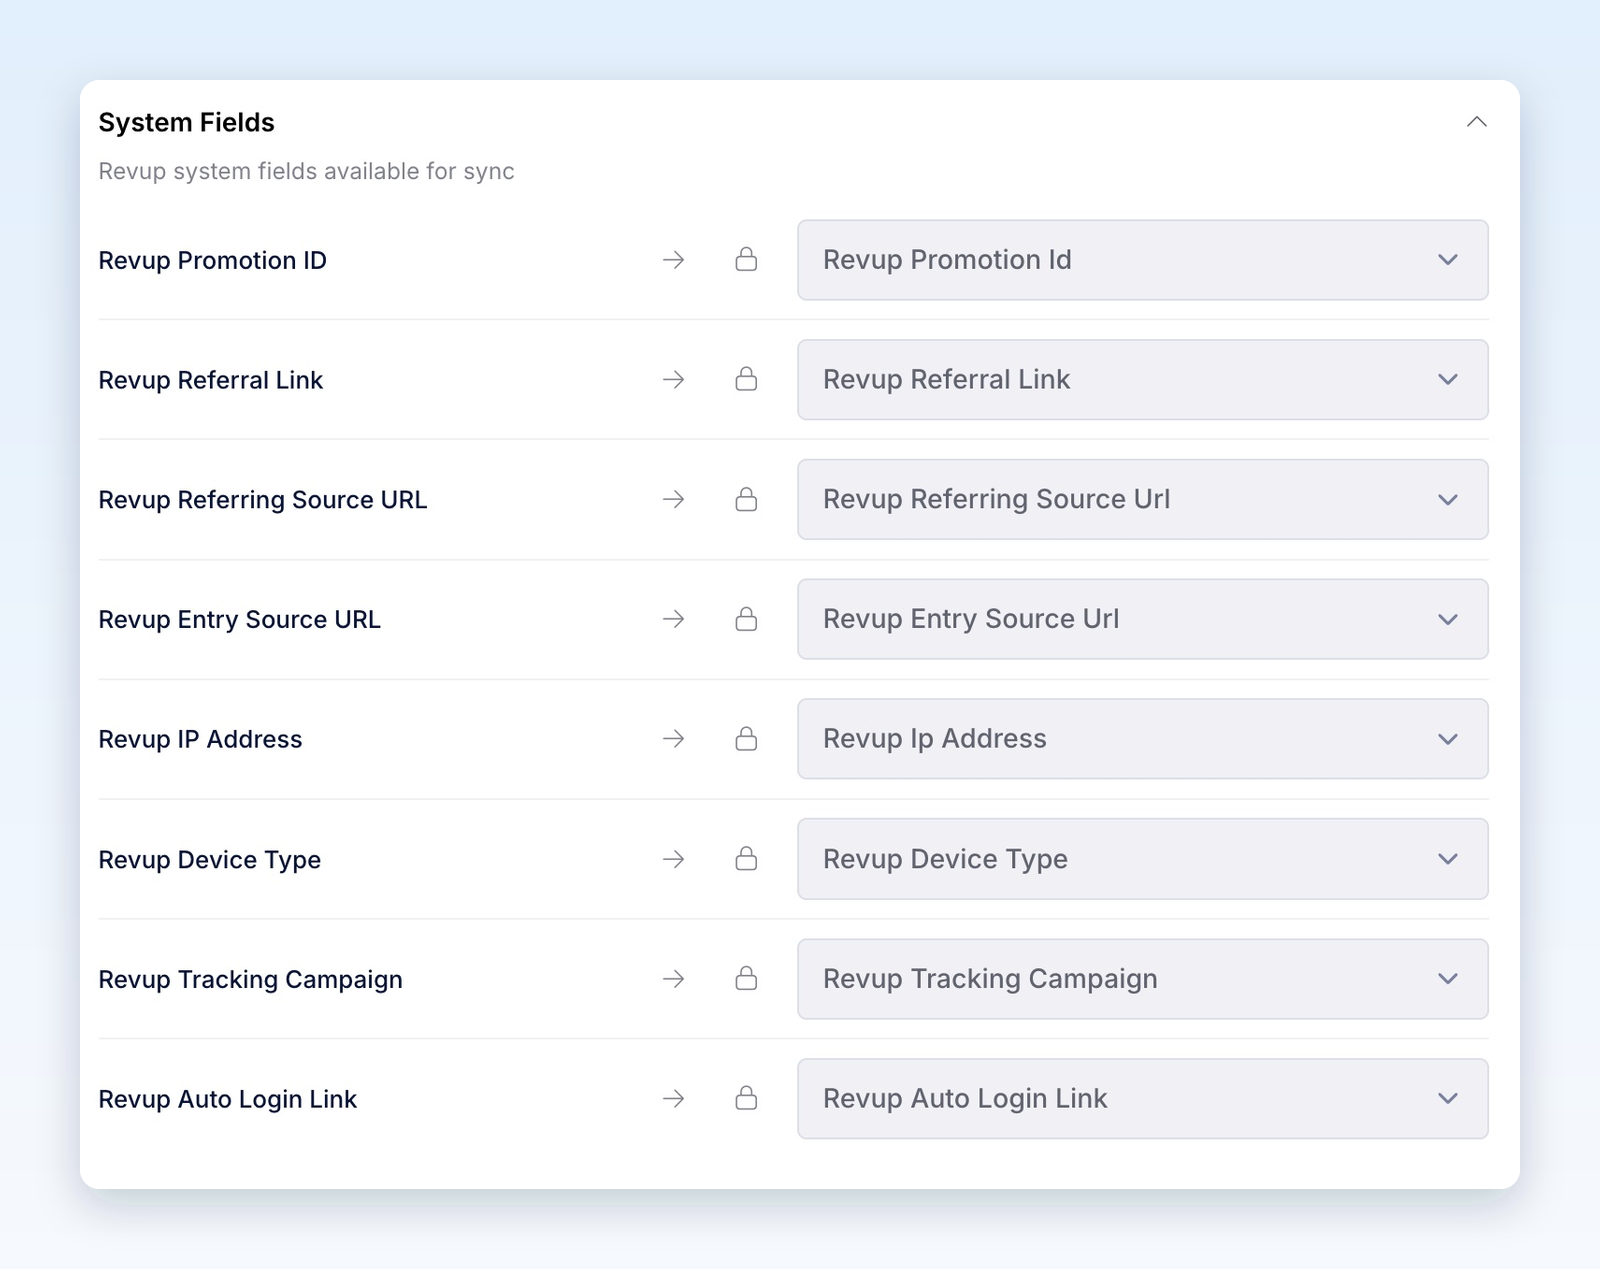
System fields describe the participant's latest entry. Use a promotion-specific tag when you need to keep a record of which promotions they entered.
Email and SMS consent
Connecting Constant Contact does not create consent. Revup checks each contact method separately:
- If your form has Email Consent and the participant leaves it unchecked, Revup leaves their email address out of the sync. The contact can still be sent using their phone number when they check SMS Consent.
- If your form has SMS Consent and the participant leaves it unchecked, Revup leaves their phone number out. The contact can still be sent using a permitted email address.
- If neither a permitted email nor a permitted phone number remains, Revup skips the delivery.
- Without an Email Consent field, Revup sends mapped email addresses through Constant Contact's sign-up flow. Add the field when you want participants to choose whether to subscribe.
- Without an SMS Consent field, a phone number may still be sent alongside an email address as contact data, but Revup does not subscribe it to SMS marketing. A checked SMS Consent field sends an explicit promotional SMS consent record.
Providing contact details or accepting Official Rules does not itself grant marketing consent. Use clear consent language and check the resulting email and SMS status in Constant Contact before sending campaigns.
Segment contacts by promotion
Use a tag to group everyone who entered a specific promotion. Revup Promotion ID only holds the most recent promotion, so a tag is more reliable for this purpose.
- In Configure Constant Contact, add a unique tag, for example
summer-coffee-giveaway, and select Save. - In Constant Contact, go to Audience → Lists and segments, select Create new, choose Segment, and continue to the segment builder.
- Add a Tags condition that includes your promotion's tag, then save the segment for follow-up campaigns.
You can also review tagged contacts from Contacts → the three-dot menu → Manage tags. See Constant Contact's tag guide for its tagging and targeting options.
Add a referral link to a Constant Contact email
In the email editor, use Insert → Contact Details and select the Revup Referral Link custom field. This inserts each recipient's own share URL. Constant Contact inserts contact-detail URLs as plain text, so tell recipients they can copy the URL into their browser if their email app does not make it clickable. See Constant Contact's personalized-link guidance.
When your promotion has a Share with friends bonus action, friends who enter through this link count toward the participant's bonus entries. The field holds the link for their latest promotion, so send referral emails while that promotion is running.
Add a return link to a Constant Contact email
Use Insert → Contact Details and select Revup Auto Login Link to bring participants back for daily entries or bonus actions without making them fill out the form again. As with the referral link, include copy-and-paste instructions if the URL is not clickable.
This link is private to each participant. Use it only in one-to-one emails and automations, never in public posts or shared pages.
Disconnect Constant Contact
- Stop syncing one promotion: In that promotion's Integrations panel, select the trash icon on the Constant Contact card, then Yes, remove. The account stays connected for your other promotions.
- Disconnect the account everywhere: Go to Account → Integrations. Under Connected Integrations, open the actions menu on the Constant Contact row and select Disconnect. If promotions use the connection, confirm with Yes, disconnect from all; Revup removes it from those promotions.
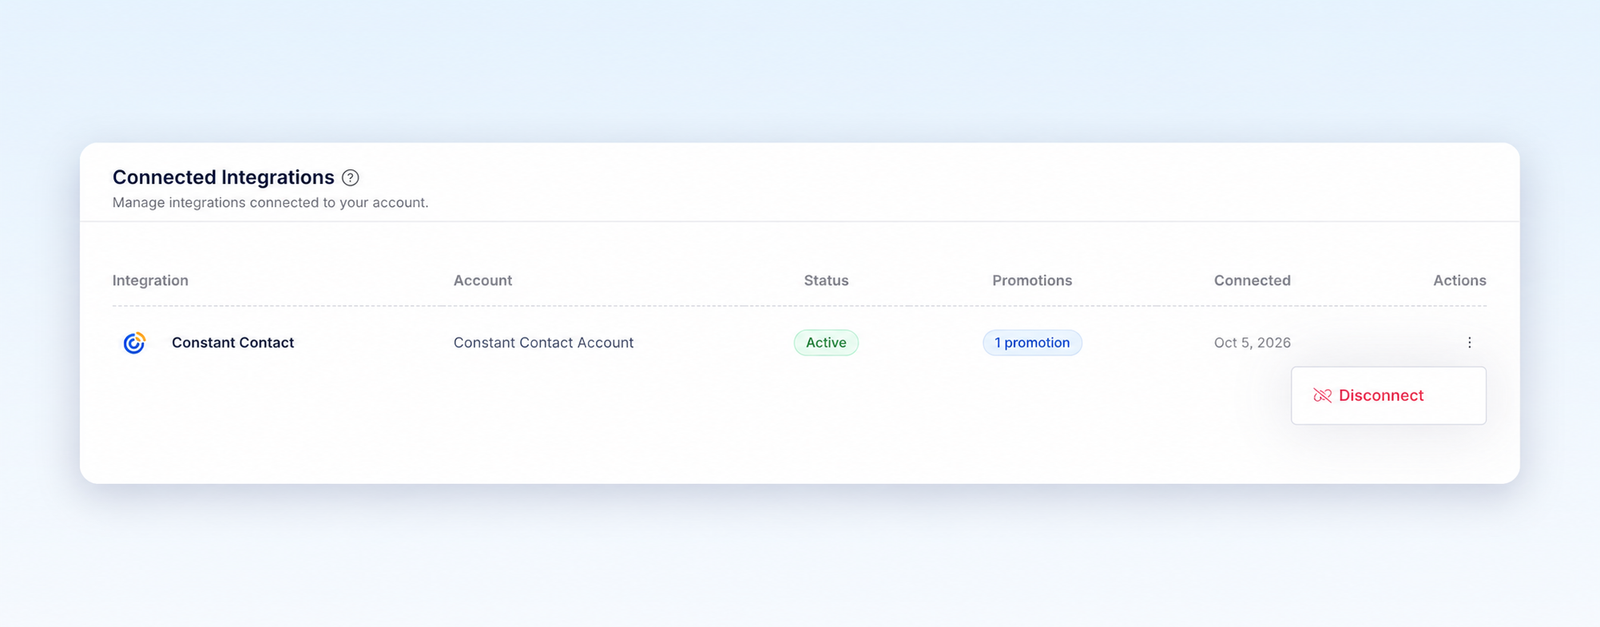
Disconnecting stops future syncs and removes the saved authorization from Revup. It does not remove contacts, list memberships, or tags already sent to Constant Contact.
Troubleshooting
If a participant does not appear in Constant Contact, check these in order:
- Test entry: Entries from the builder preview are never sent. Use the public promotion link after the promotion starts.
- Consent: Check whether the participant allowed the email or phone data needed for delivery.
- Existing contact: Search Contacts by email address before looking for a new contact.
- Setup Required: If the card shows Setup Required, select the edit icon, choose a list, and select Save.
- Trial limit: During a Revup trial, integration delivery is limited to participants within your account's first 20 profiles.
- Authorization: If Revup asks you to reconnect, authorize the same Constant Contact account again. If the authorization window does not open, allow pop-ups for Revup.
- List or field: Confirm the selected list still exists and review any error about a missing or incompatible field. Refresh the list options or adjust the mapping, then save.
- SMS conflict: A phone number already assigned to another Constant Contact contact can prevent SMS subscription on the new contact. Review the existing contact in Constant Contact before changing its details or consent.
After fixing a failed delivery, open the participant in Revup, go to Activity, and select the retry icon (Retry Constant Contact) next to the failed delivery.
Was this helpful?
Still need help? Ask the team