Connect Omnisend
Connect Omnisend to a Revup promotion, add tags, review field mappings and consent, and verify participant delivery.
Before you start
- Sign in to the Omnisend account that should receive participants, with permission to authorize integrations.
- Your form needs a visible Email or Phone Number field. Omnisend uses these details to identify contacts.
- Add Email Consent if participants should choose whether to receive marketing emails. For SMS subscriptions, add SMS Consent and collect the participant's explicit opt-in.
- Purchase Sweepstakes promotions do not have an Integrations tab, so you cannot connect Omnisend to them.
Connect Omnisend to a Revup promotion
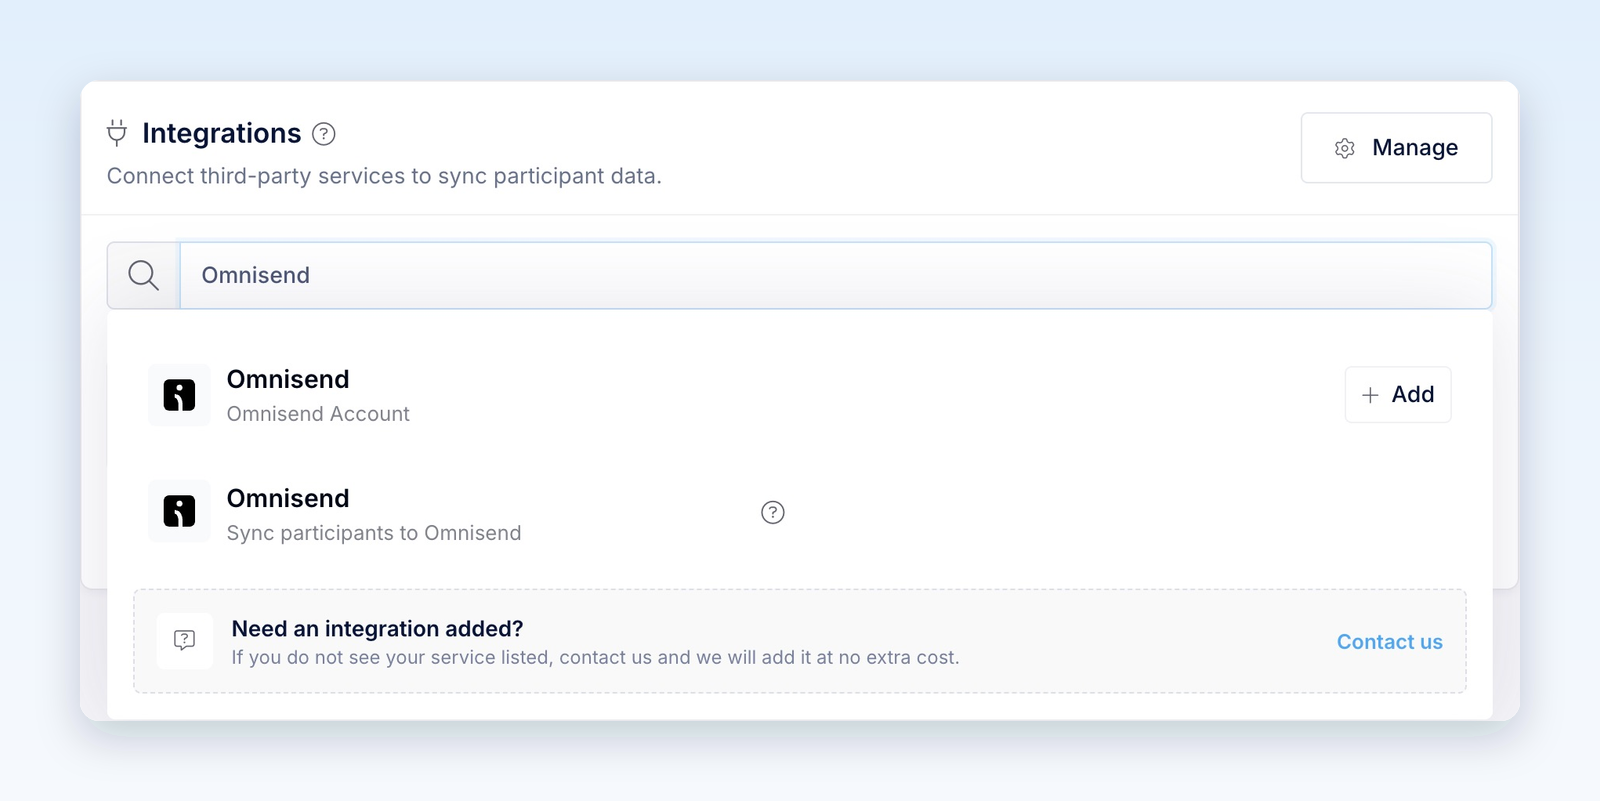
- Open the promotion builder, go to Integrations, and select + Add Integration.
- Choose Omnisend from the available integrations. If your account already has a reusable Omnisend connection, select + Add next to it under Your Connected Accounts instead.
- In the Omnisend window, sign in if needed and approve Revup's requested access for the intended account. You do not need to copy an API key. Return to Revup when authorization finishes.
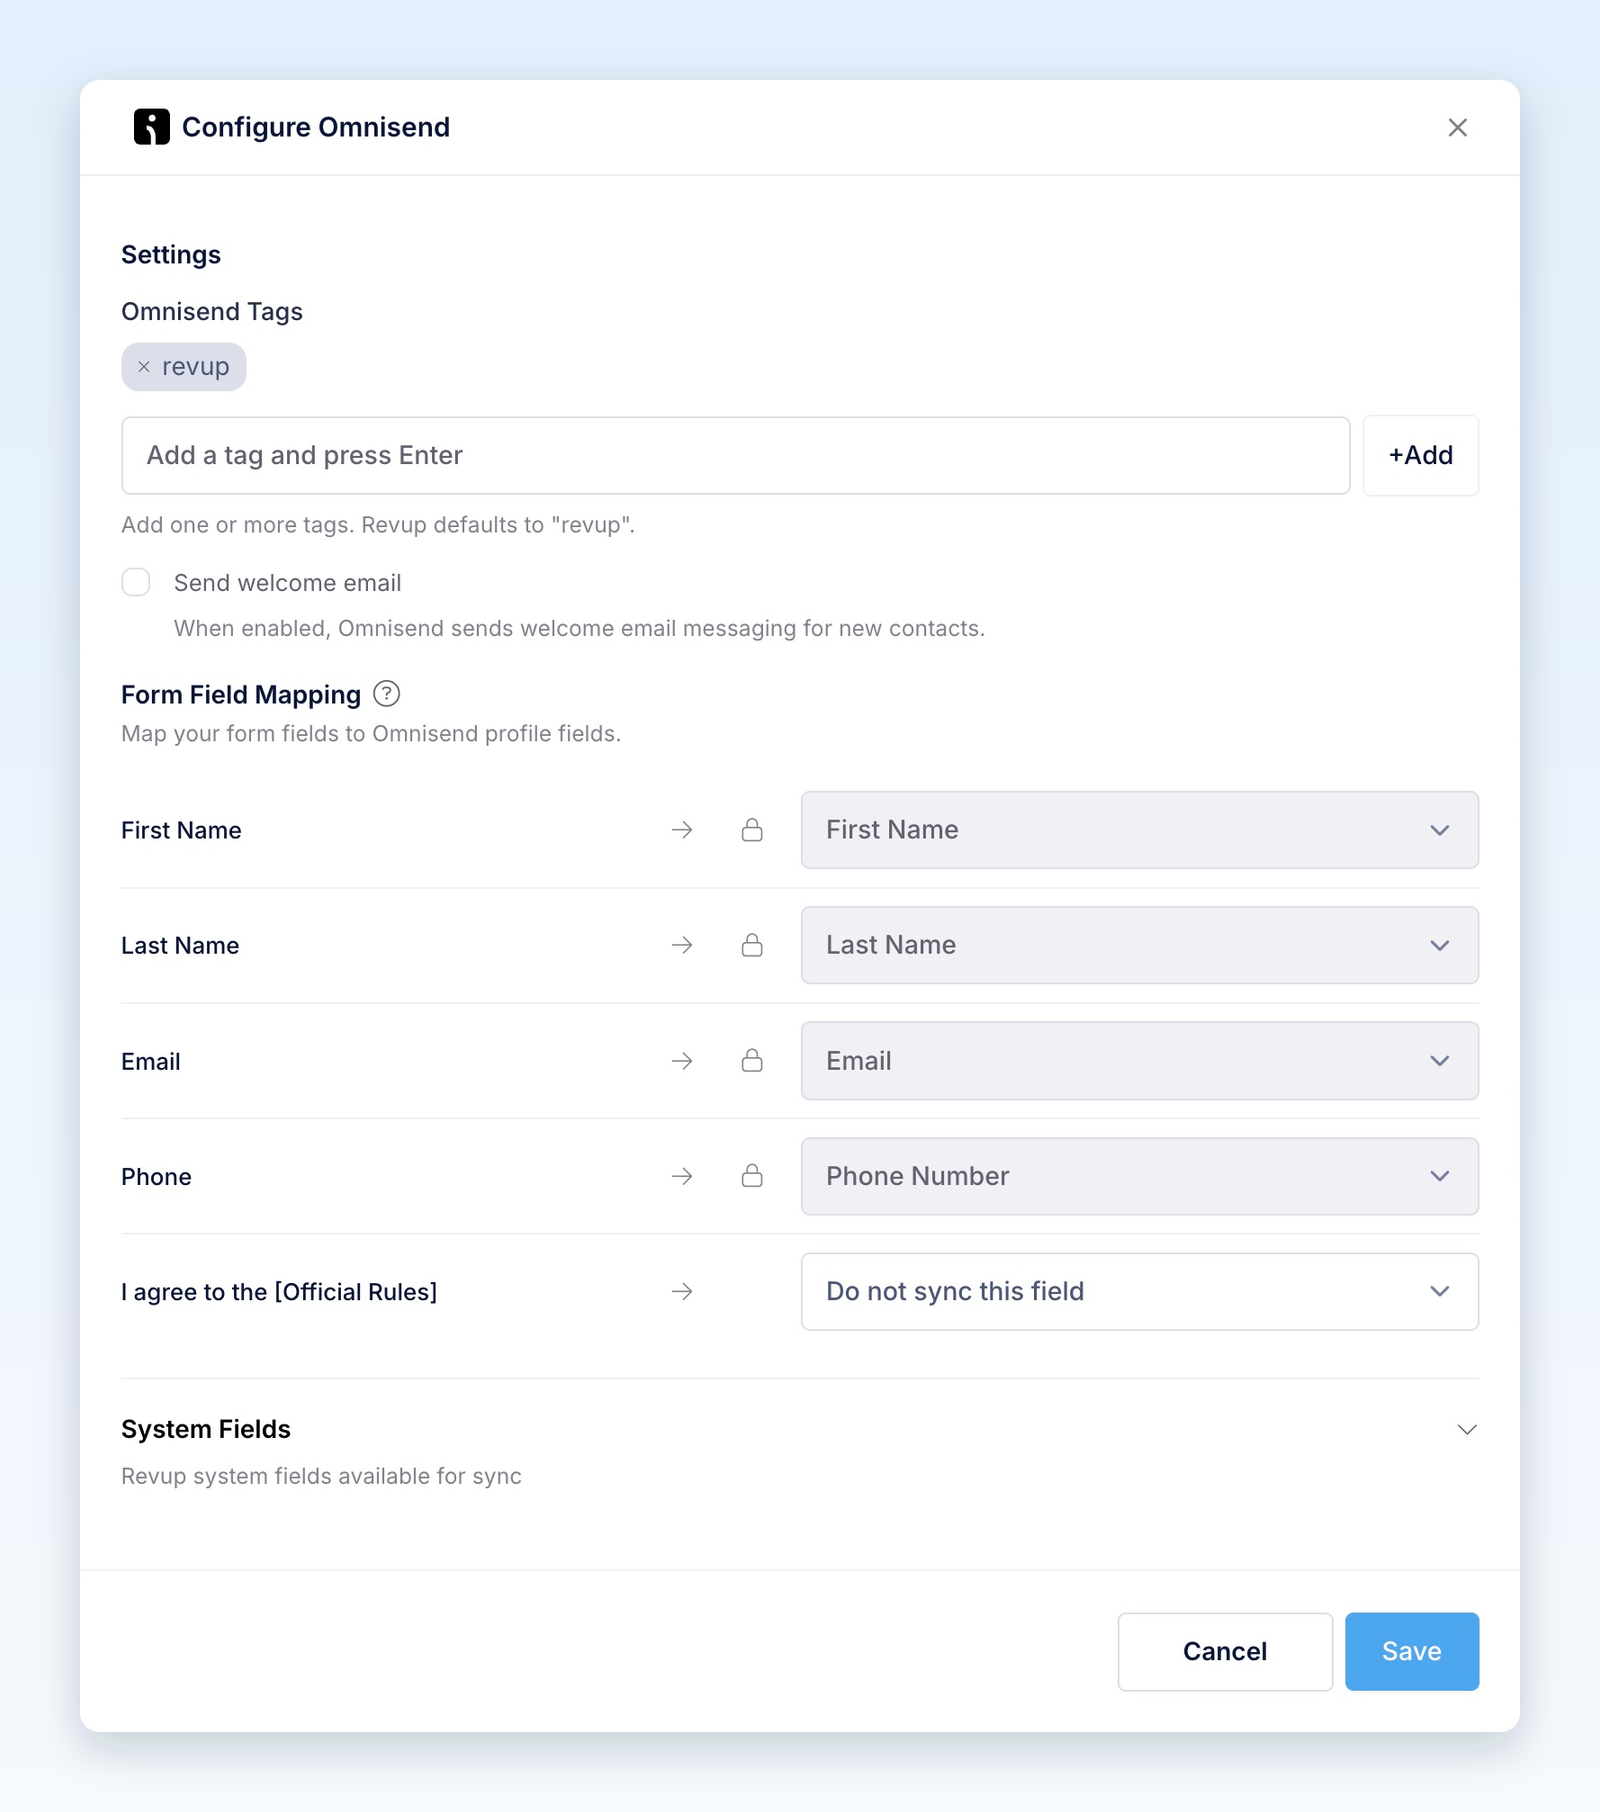
- In Configure Omnisend, review Omnisend Tags. The default tag is
revup. To add another tag, type it and press Enter or select +Add. Use a promotion-specific tag such asfall-giveawayto identify this promotion's participants later. - Decide whether to enable Send welcome email. It is off by default. See Welcome emails below before turning it on.
- Review Form Field Mapping. Rows with a lock icon are mapped automatically. For other answers, choose an existing custom property, select + Create custom field, or leave Do not sync this field selected.
- Expand System Fields to review the promotion details sent with each eligible participant.
- Select Save.
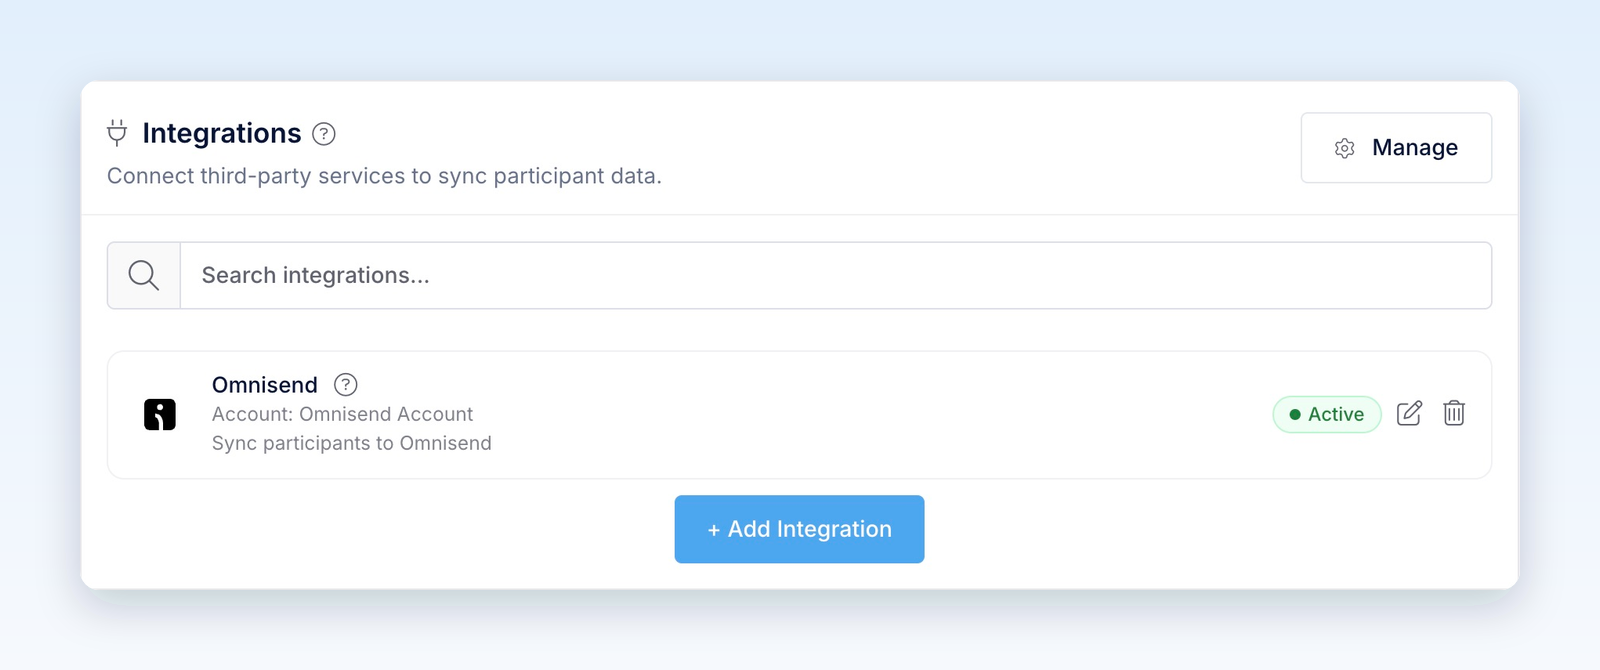
Omnisend does not have a destination-list selector in Revup. Contacts go to the connected Omnisend account; use tags and Omnisend segments to organize them.
The integration card shows Active once configuration is complete. This confirms the setup is saved; the public-entry check below confirms that data reaches Omnisend.
Map participant information
Revup automatically maps standard fields when they are present on your form: First Name, Last Name, Email, Phone Number, Address, City, State, ZIP / Postal Code, Country, Gender, and Birthday. These mappings are locked. Birthday is sent to Omnisend's Birthdate field.
Other answers can be sent as custom properties. On an editable mapping row, choose an existing property or select + Create custom field, enter a name, and select Create. Save the configuration afterward. A newly configured custom property appears on an Omnisend contact when an eligible participant syncs with a value for it; configuring the mapping alone does not populate contacts.
Address Line 2 needs a custom property. It is separate from the standard Address mapping. If you collect it, map the Address2 row to a custom property rather than assuming the street-address mapping includes it.
Only mapped, nonblank values are sent. A blank answer does not clear an existing Omnisend value. Use a valid full date for Birthday. Revup sends male/female values to the standard Gender field; other answers are omitted from that field. Use a separate custom question and property if you need to preserve additional responses.
For more about using these values in Omnisend, see its custom properties guide.
Email and SMS consent
Email and SMS are handled separately. A contact appearing in Omnisend does not necessarily mean both channels are subscribed.
If consent filtering leaves neither a usable email nor a usable phone number, the participant is not sent.
For an existing matching email address or phone number, Revup preserves an existing Subscribed or Unsubscribed status unless the participant explicitly checks the corresponding consent field. Simply entering another promotion without a consent field does not resubscribe someone who previously unsubscribed. Leaving a consent field unchecked omits that identifier from this sync; it does not unsubscribe an existing contact in Omnisend.
Review both channel statuses on your test contact before sending campaigns.
Welcome emails
Send welcome email is off by default. Turning it on asks Omnisend to send welcome email messaging when Revup creates an eligible new email contact. The participant must also pass the email-consent check.
Revup does not request another welcome email when it updates an existing contact, including a repeat entry or a retry after the contact was already created. This setting does not request a welcome SMS.
Configure and enable the appropriate welcome automation in Omnisend and check its audience and trigger filters. The checkbox does not create an automation or guarantee delivery. Test with a new email address you control and check the contact's automation activity in Omnisend.
Group participants with tags
Use Omnisend Tags to identify the source promotion. For example, keep revup and add fall-giveaway. Revup adds those tags while preserving other tags already on the contact.
Each promotion has its own tags. Changing or removing a tag in Revup affects future syncs; it does not remove tags already applied to Omnisend contacts. An explicitly empty tag setting adds no promotion tags.
Build an Omnisend segment from your promotion-specific tag when you want to target those participants. See Omnisend's guide to organizing contacts with tags.
What promotion details are sent
Revup includes eight locked System Fields as Omnisend custom properties. They are sent when they have a value.
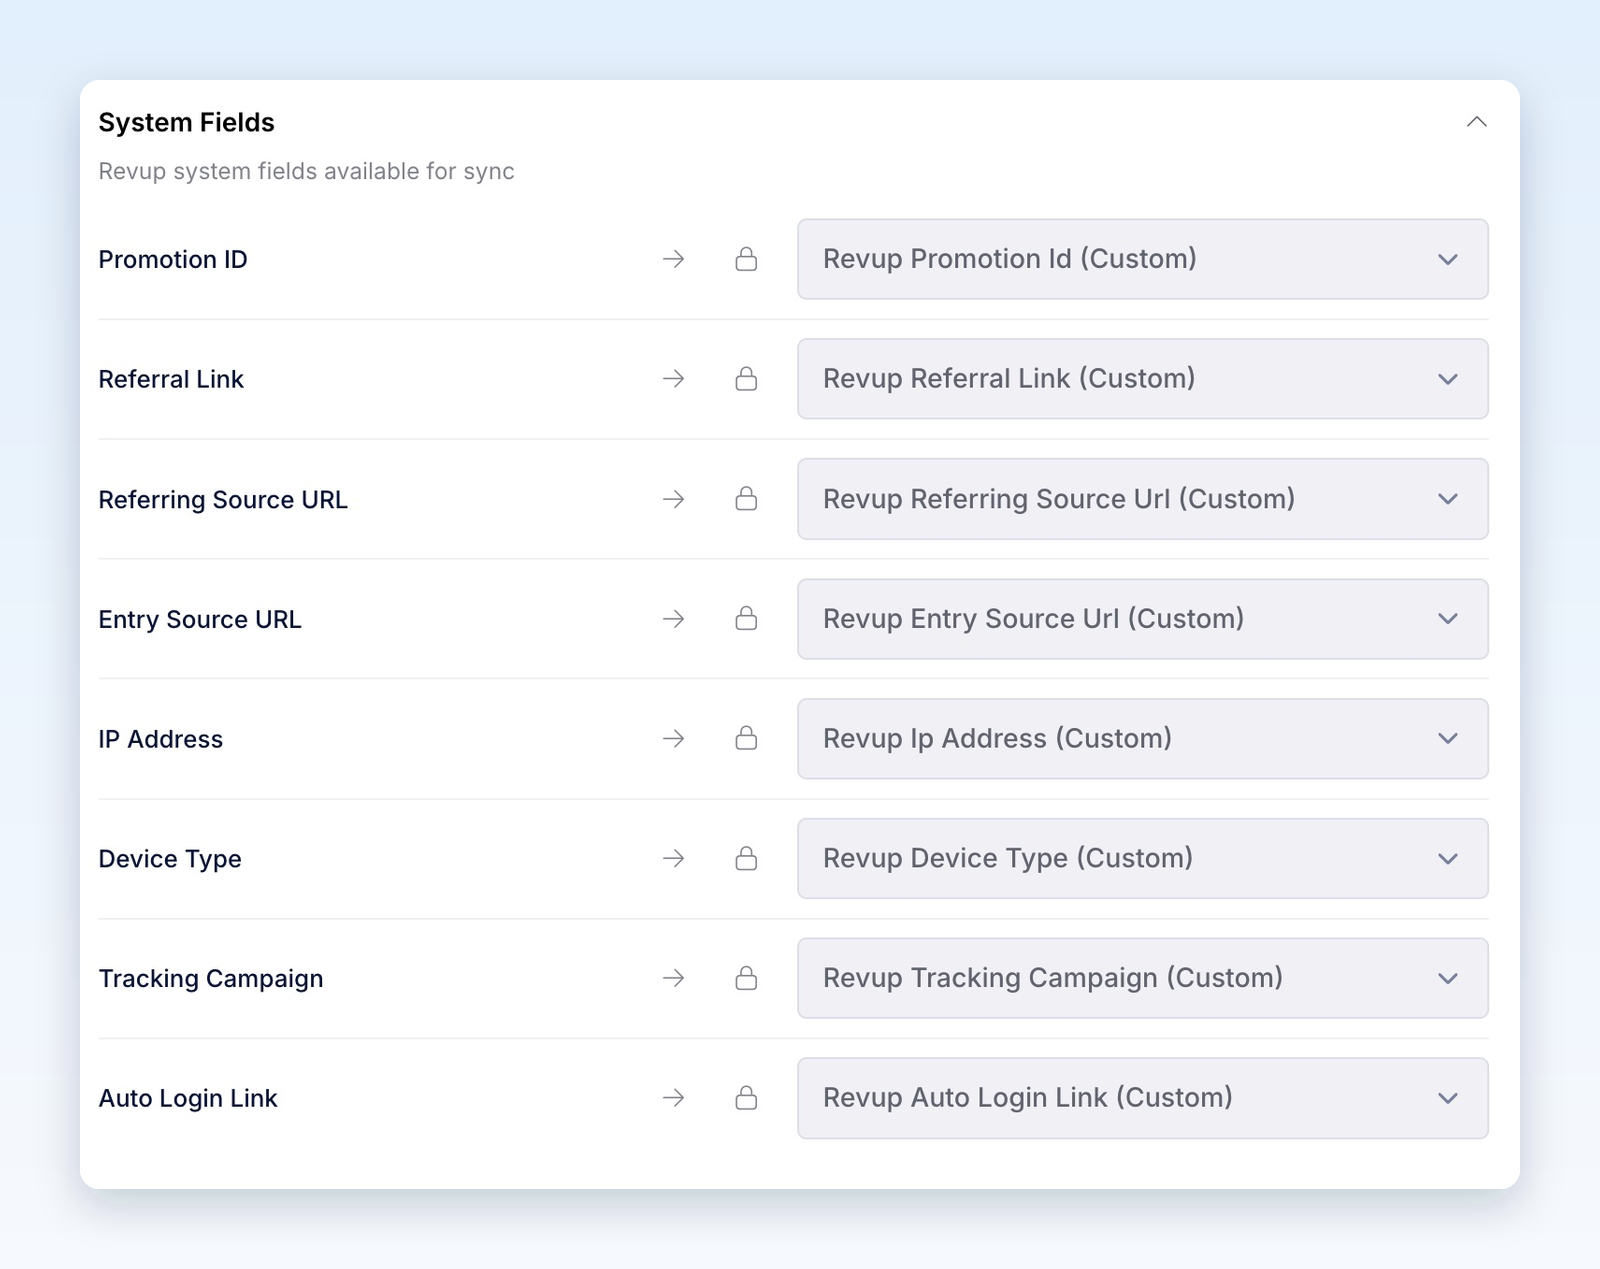
If the same contact enters another connected promotion, these properties can be updated with the later entry's values. They do not store a history of every promotion. Use promotion-specific tags to preserve each promotion's grouping.
Use referral and return links in Omnisend emails
After a participant syncs, you can personalize emails with the Revup Referral Link and Revup Auto Login Link custom properties. In Omnisend's email editor, use Personalization tag → Custom properties and select the property you need.
- Referral Link: lets participants share the promotion. Eligible friends who enter through it can count toward an enabled Share with friends bonus action.
- Auto Login Link: returns a participant to their own entry. This link is private; send it only to that participant, never in a public post or shared page.
Use Omnisend's Dynamic Preview with a contact to check the actual values. Ordinary test emails do not populate real contact data. See Omnisend's personalization guide.
Check that the links belong to the intended promotion before sending. A later sync can replace them.
Check your first delivery
- After the promotion starts, open its public link and submit an entry using your own email address or phone number. Select the consent choices needed for your test.
- In Omnisend, find the contact by that email address or phone number. Revup creates a contact or updates the matching contact already there.
- Confirm the mapped answers, tags, system properties, and separate email/SMS subscription statuses.
- If testing Send welcome email, use a new email address and check whether it entered the intended Omnisend automation.
- In Revup, open the participant and review Activity for delivery details.
Entries submitted through the builder preview are test entries and are never sent to integrations. During a trial, integrations sync only the first 20 participants across the Revup account. Upgrading enables future syncs; skipped participants are not sent retroactively.
Use Omnisend in another promotion
The account connection can be reused. In another promotion, open Integrations → + Add Integration, select + Add beside the Omnisend connection under Your Connected Accounts, and configure that promotion's tags, welcome-email setting, and mappings.
Select Manage in the Integrations panel or visit Account → Integrations to review connected accounts.
Disconnect Omnisend
- Stop syncing one promotion: Select the trash icon on its Omnisend card, then Yes, remove. Other promotions can keep using the connected account.
- Disconnect the account everywhere: Go to Account → Integrations, open the Omnisend connection's actions menu, and select Disconnect. If promotions use it, confirm Yes, disconnect from all.
Disconnecting stops future syncs. It does not remove contacts, properties, or tags already sent to Omnisend.
Troubleshooting
- Authorization does not open: Allow pop-ups for Revup and try again. Confirm that your Omnisend user can authorize integrations.
- Setup Required: Open the edit icon, review the settings and mappings, and select Save.
- Participant missing: Check for a preview entry, consent that removed the identifiers, or the trial limit. Search the connected Omnisend account for an existing contact.
- SMS is not subscribed: Confirm the form includes SMS Consent and the participant checked it. A phone number alone does not create an SMS subscription.
- Welcome email missing: Check the checkbox, email consent, whether the contact already existed, and Omnisend's active automation and filters.
- Custom property missing: Confirm the answer is mapped and nonblank, then check a synced contact. A property may not appear before its first delivery. Existing properties may not all be listed in Revup's dropdown; use a deliberate custom-property name when configuring a new mapping.
- Address Line 2 missing: Map Address2 to a custom property; it is not included automatically in Address.
- Failed delivery: Check the connection and the participant's delivery detail. Resolve the reported problem, then select the retry icon (Retry Omnisend) beside the failed delivery in Activity.
Was this helpful?
Still need help? Ask the team